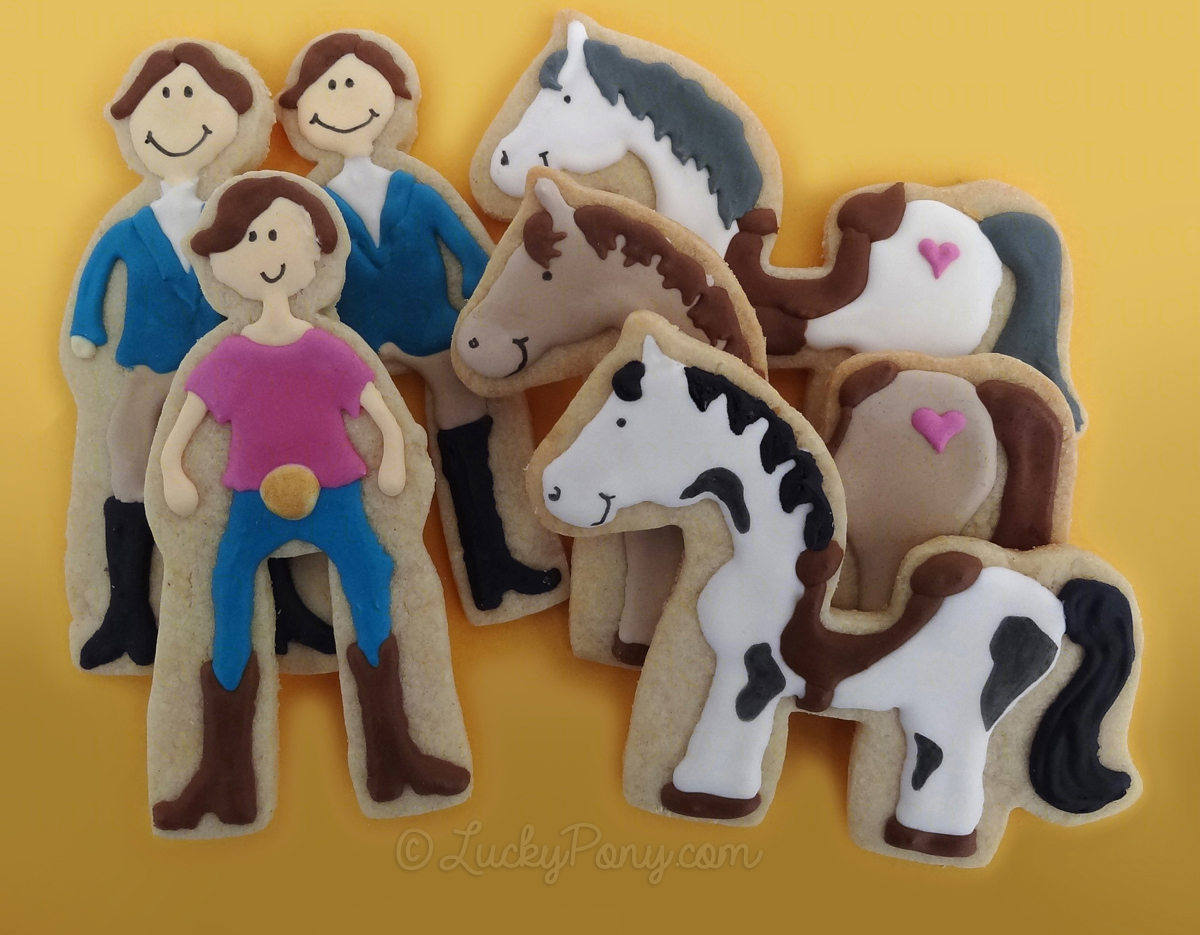
I’d always lamented that our popular horse and rider cookie cutter didn’t have a example of how adorable this cookie turns out when decorated, so after the hustle of the holidays died down last year I decided I’d bake a batch and rekindle my nearly-forgotten cookie decorating skills, picked up during my stint doing marketing and product design full time for a cookie cutter company.
PLANNING
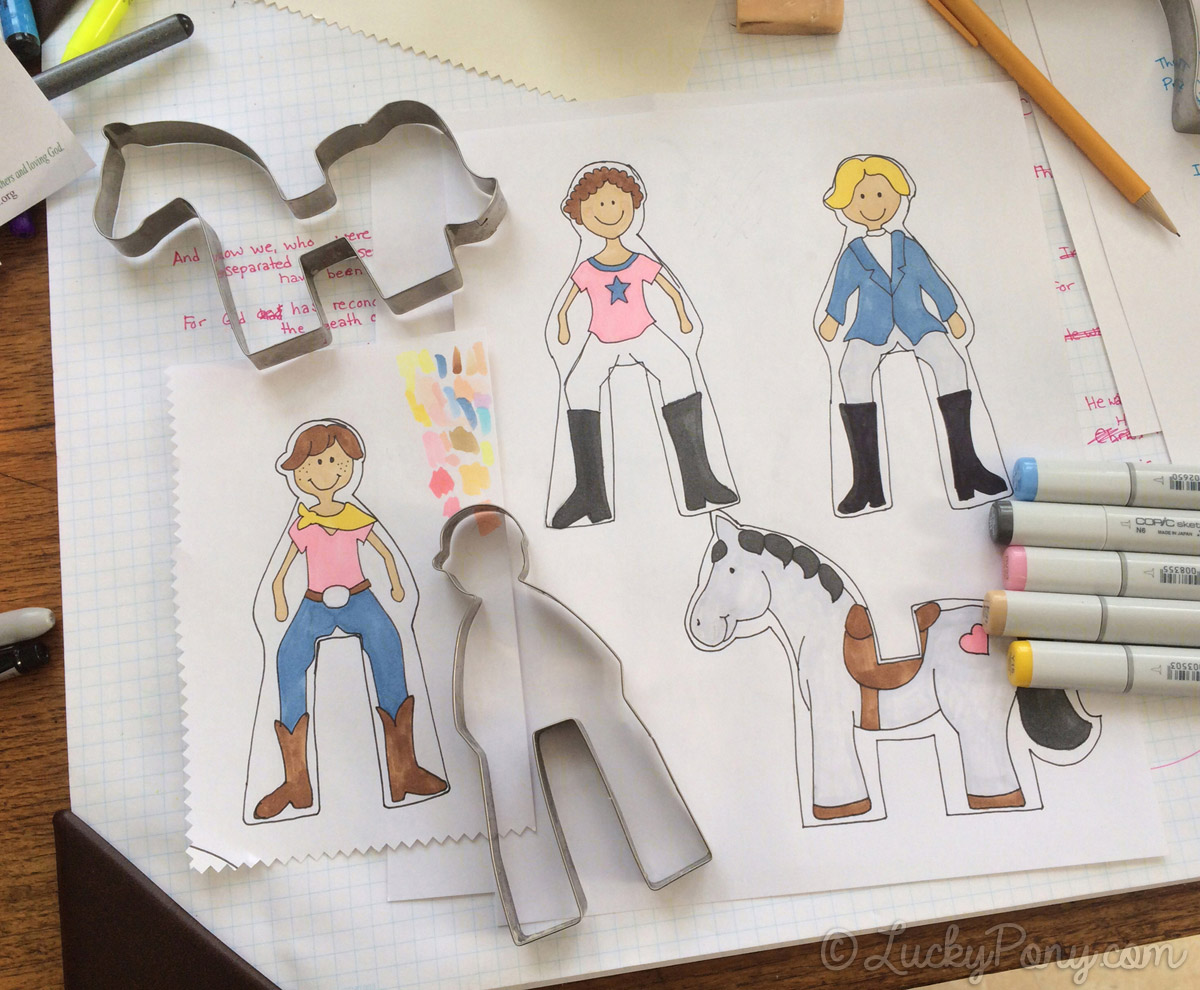
Lots of folks skip the planning step, but I find deliberately setting time aside to plan my decorating helps me create creative, consistent cookies and helps me use colors more efficiently.
These cookies could be decorated lots of ways, but I’ll be decorating these cookies using this template we created. We’ve made our decorating template available to download and print. To plan your colors, use markers, colored pencils, or even watercolor paints.
PREP YOUR WORK SPACE:
I like to spread out on the dining room table when I decorate cookies. A plastic drop cloth provides a surface that is easy to clean and food-safe.
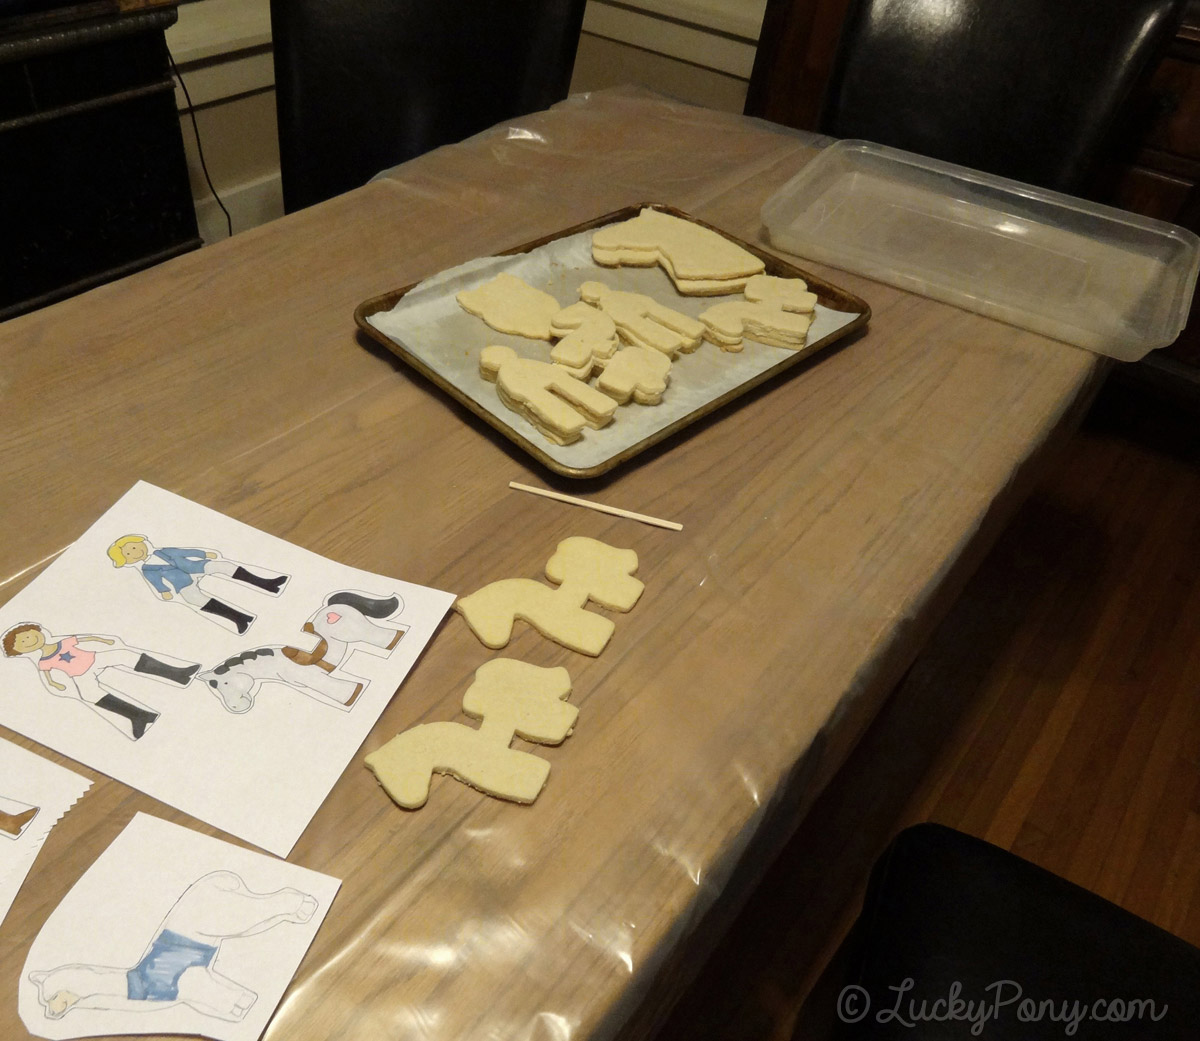
Set up your workspace so your template or plan is always handy – you may want to place it under the clear plastic to keep it visible. 
HOW TO DECORATE A HORSE SUGAR COOKIE
The instructions below feature my instructions for decorating a horse sugar cookie. There are many correct ways to decorate and only a few cardinal rules:
1. Always wait for one color of icing to form a hard, dry outside before adding another color of icing that touches or overlays.
2. Always decorate underlying colors first. (i.e. a horse mane overlays a horse neck, so the neck must be decorated before the mane is added)
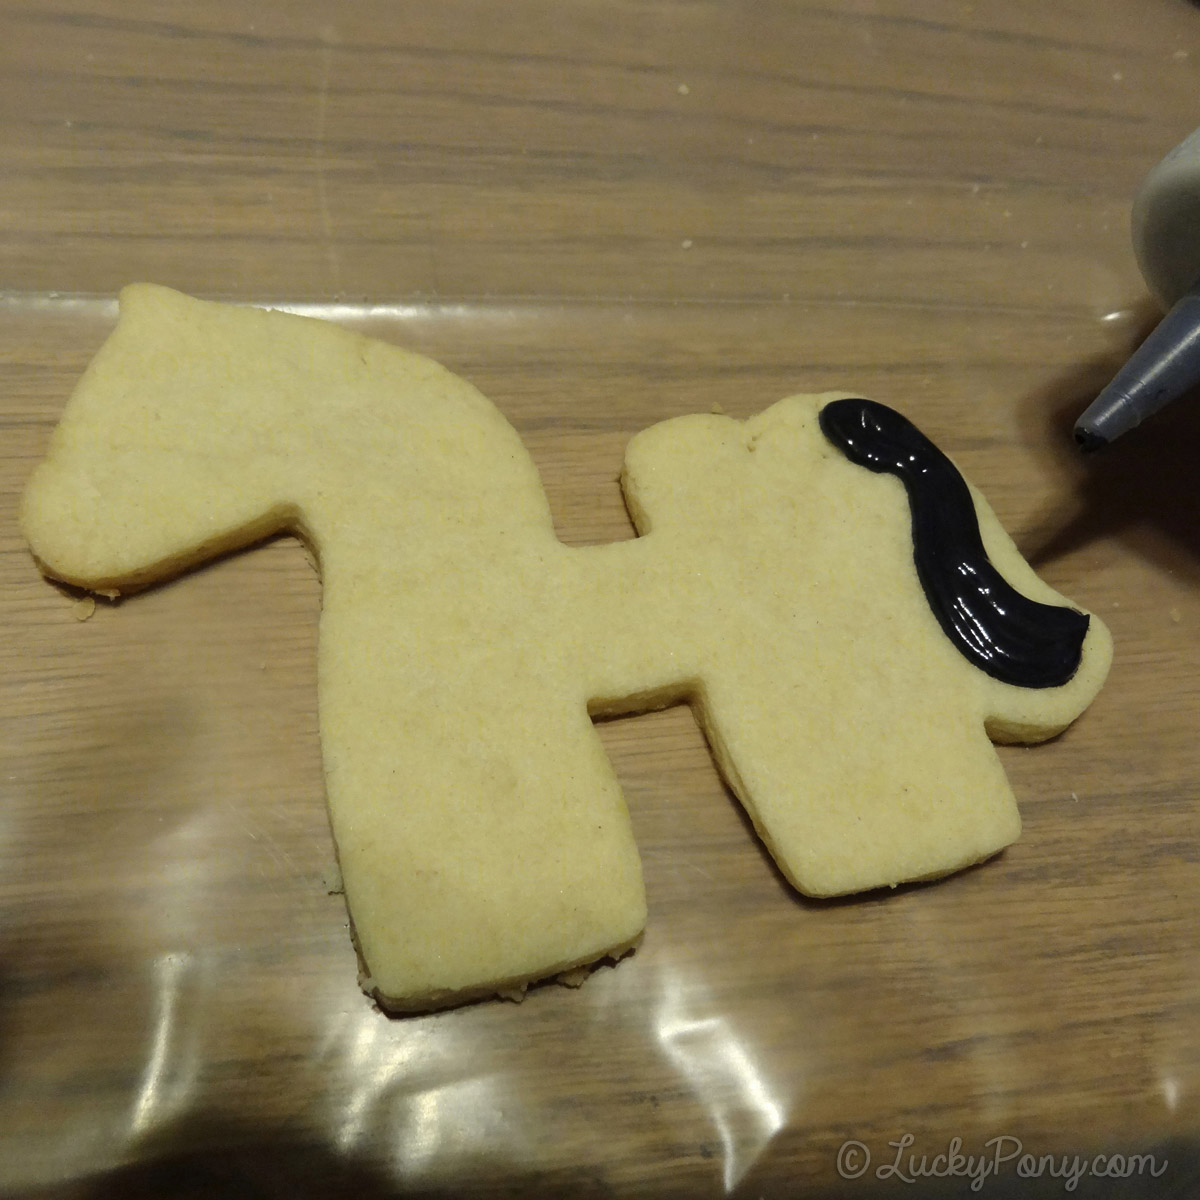
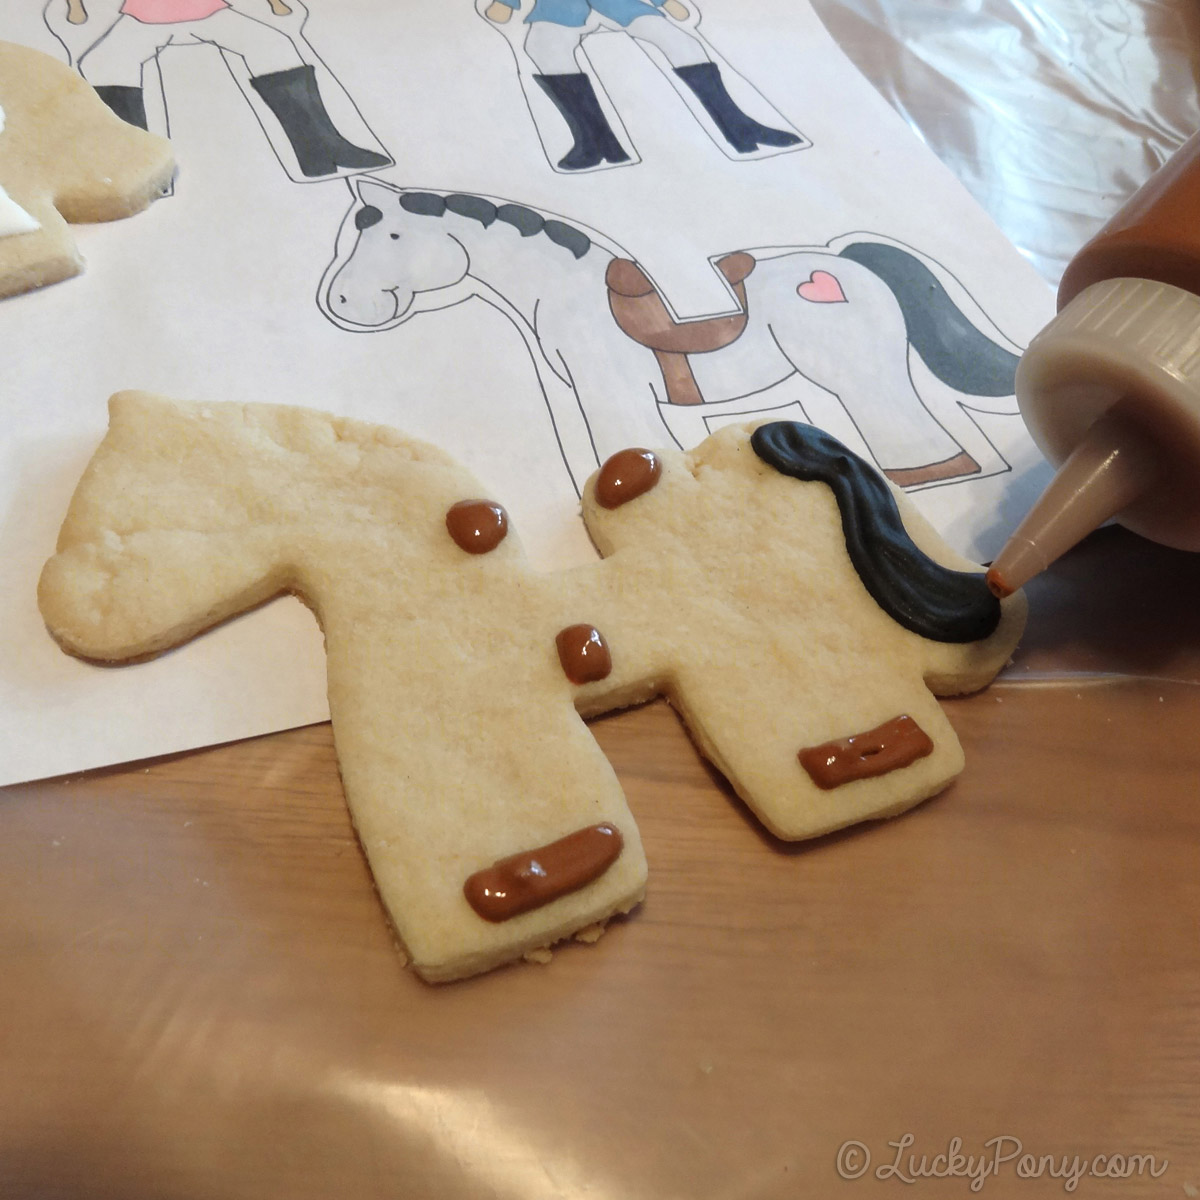
I started with the tail on most of my horses. Using a basic flooding method I created an outline and then filled with black icing. I mixed my black to be a bit thicker, to maintain a little texture that would be natural to a horse tail.
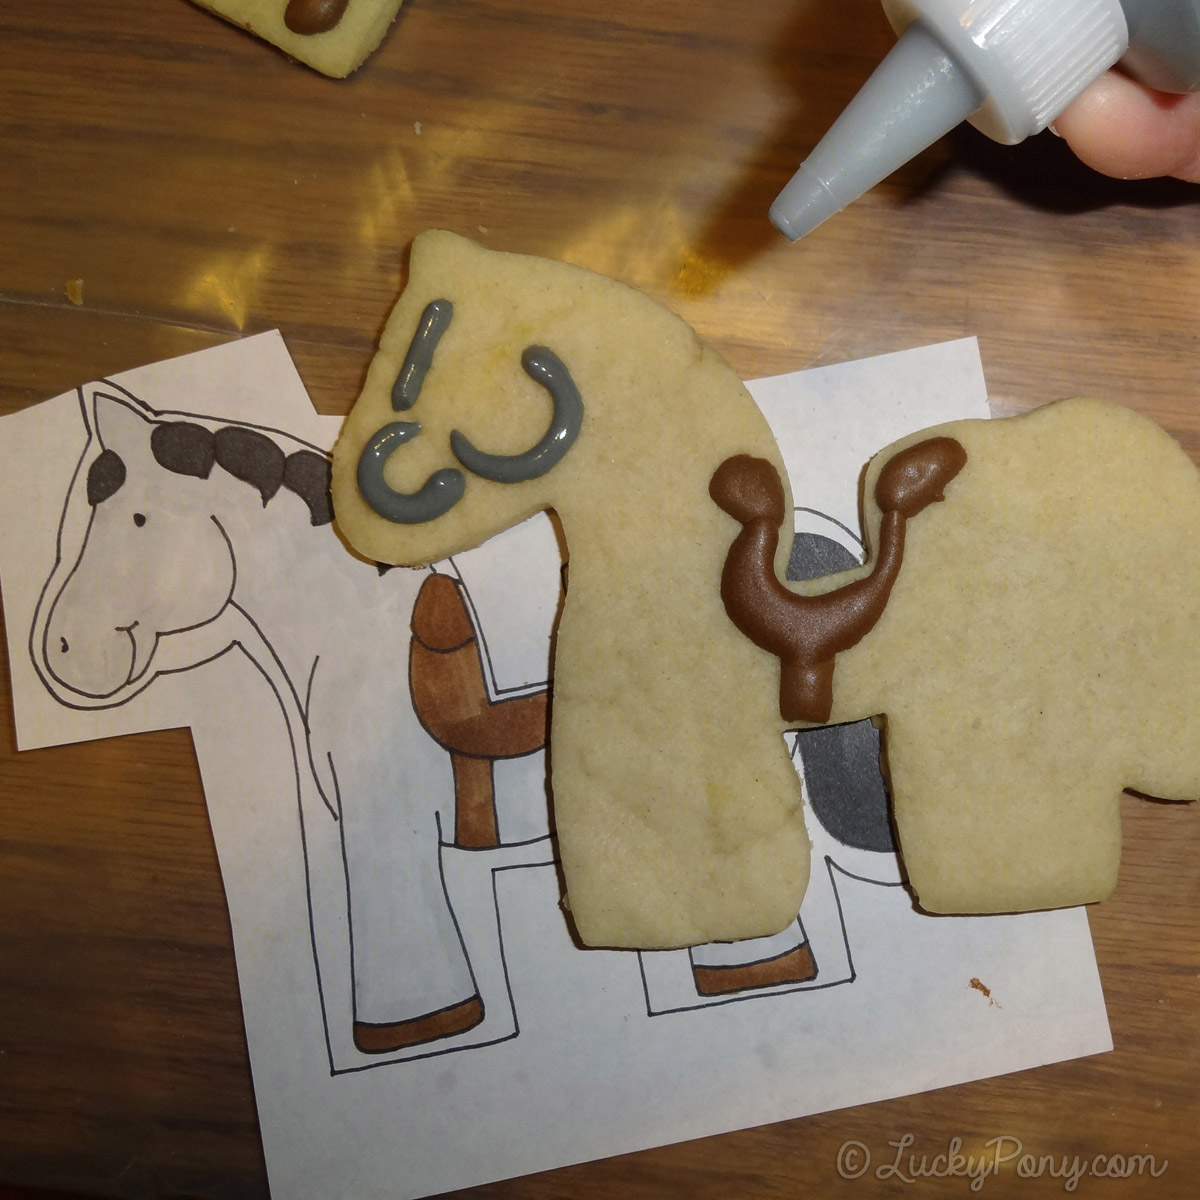
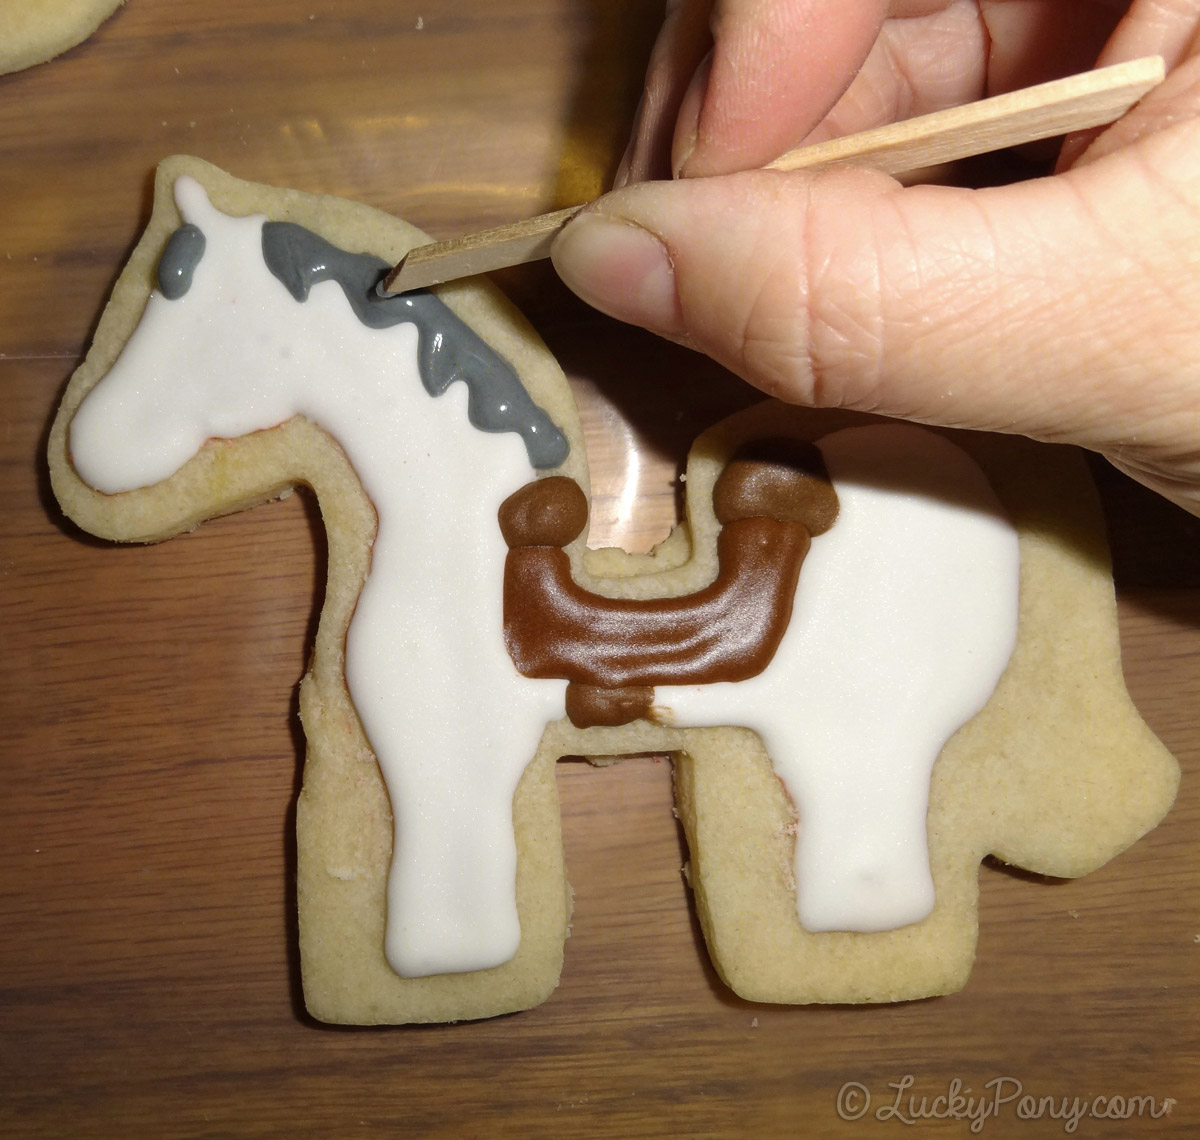
Next I decorate my saddles. Because I want the saddles to have bumps I decorate in two stages, allowing the brown icing to dry between layers of the saddle:
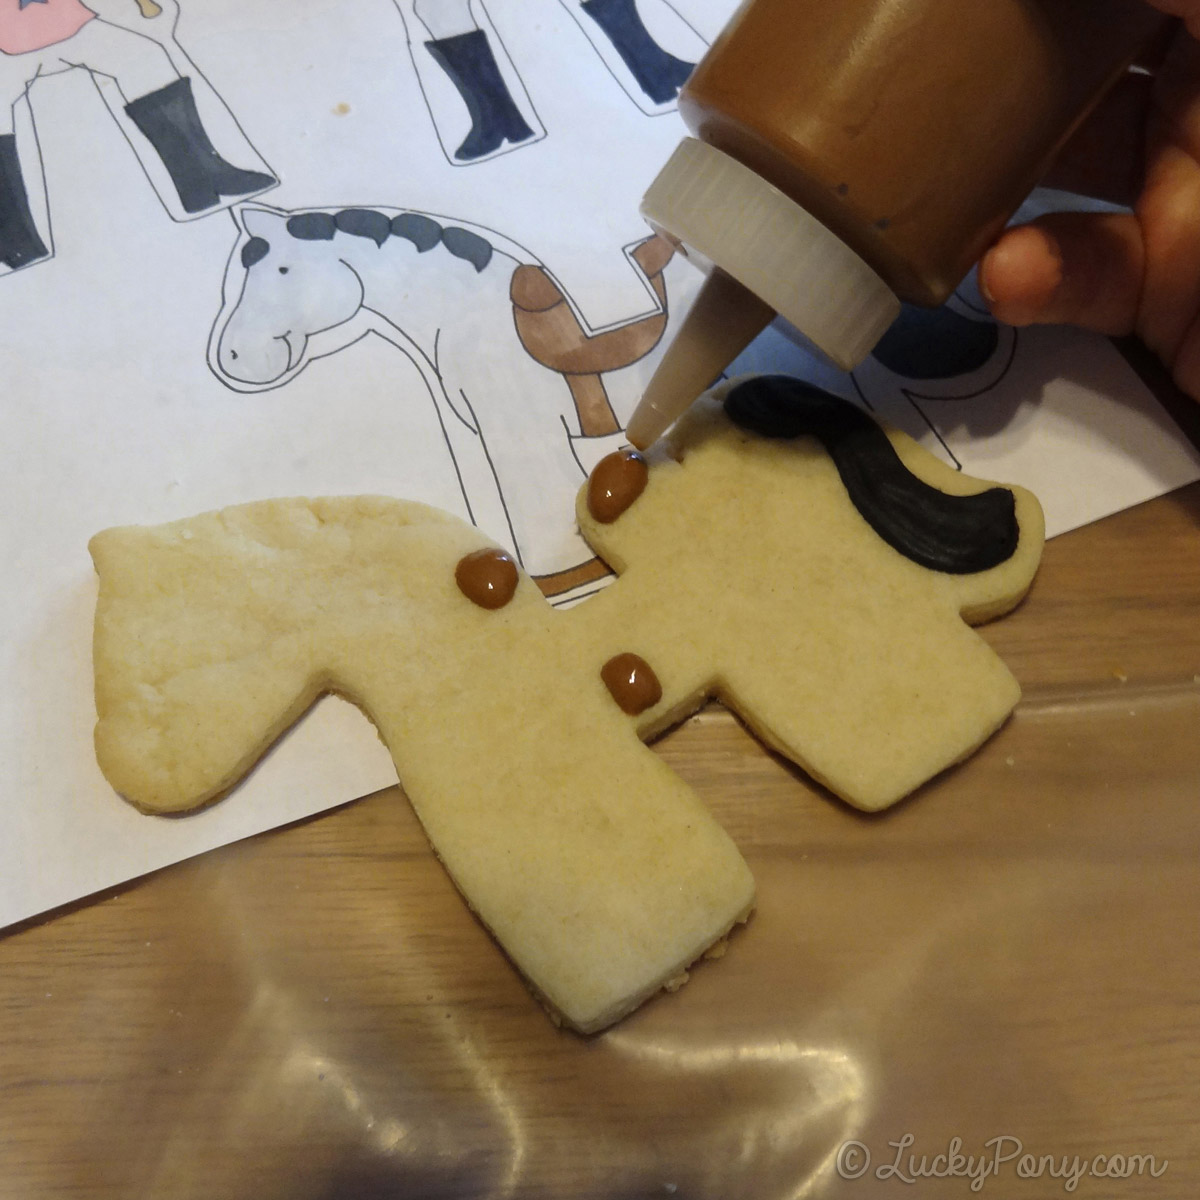
I add hooves on many of my horse cookies at the same time:
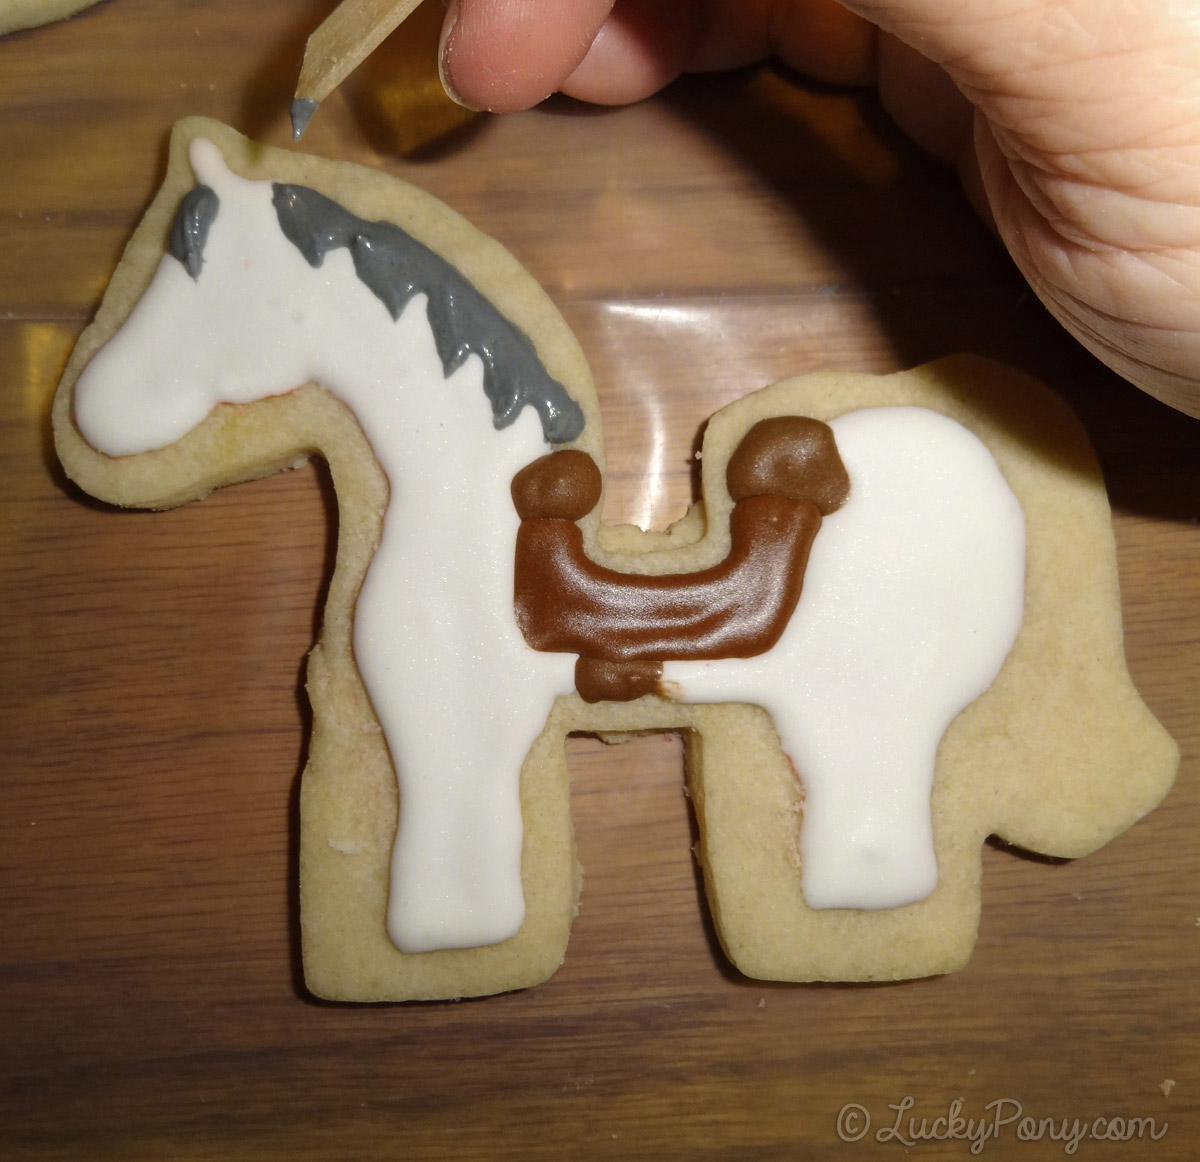
A few hours later (decorating a batch of llama cookies in the meantime!) I add the saddle flaps to the saddle. Because the first icing has dried, the seat, flap, and girth stay distinct instead of pooling into one blob of icing.
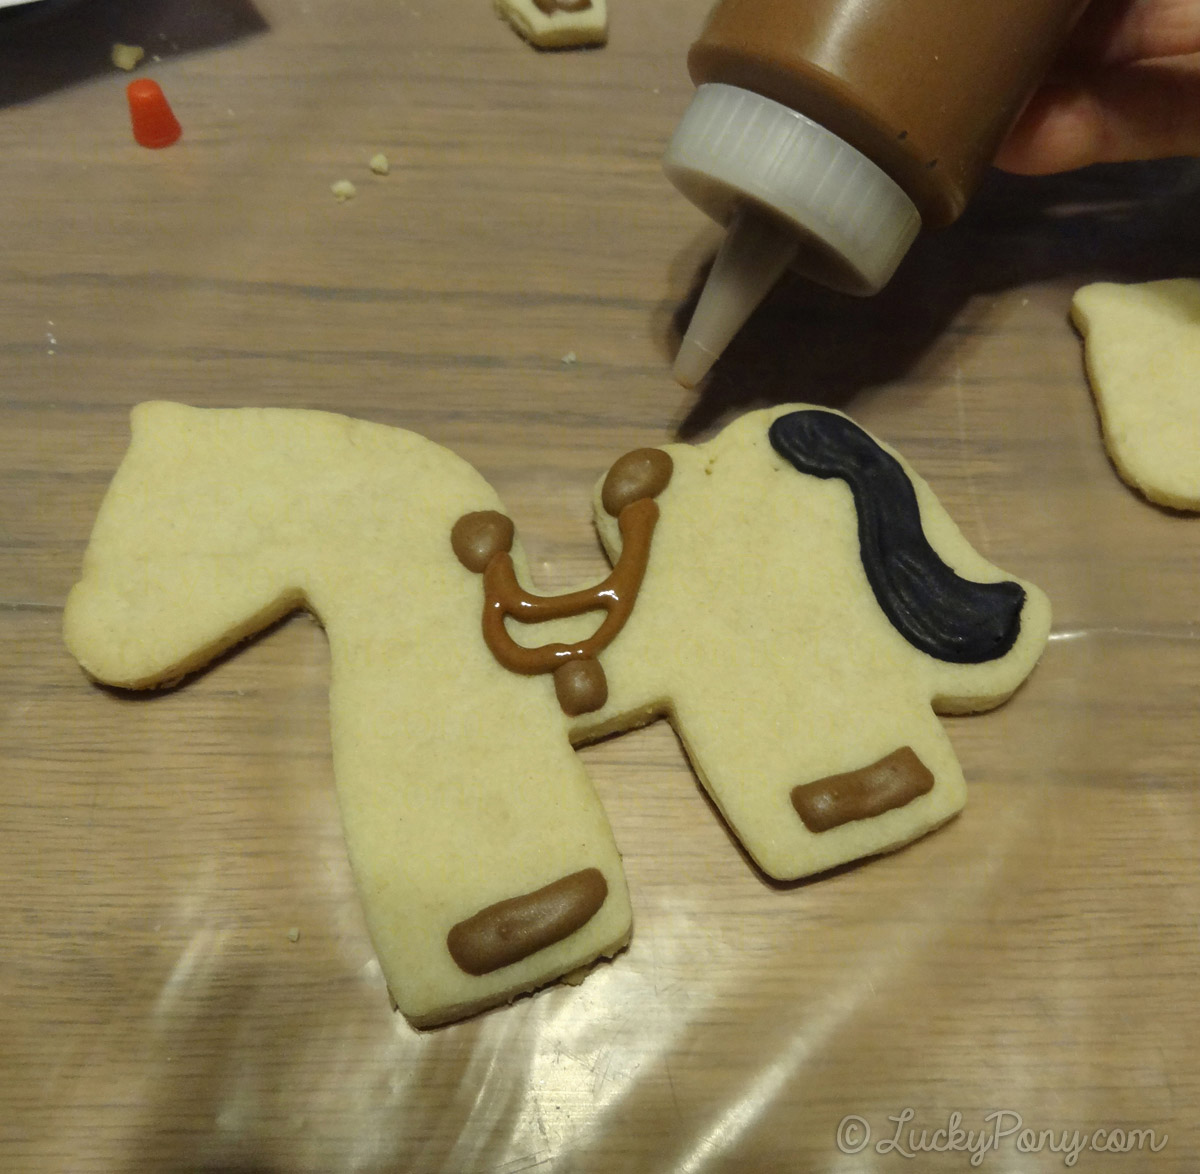
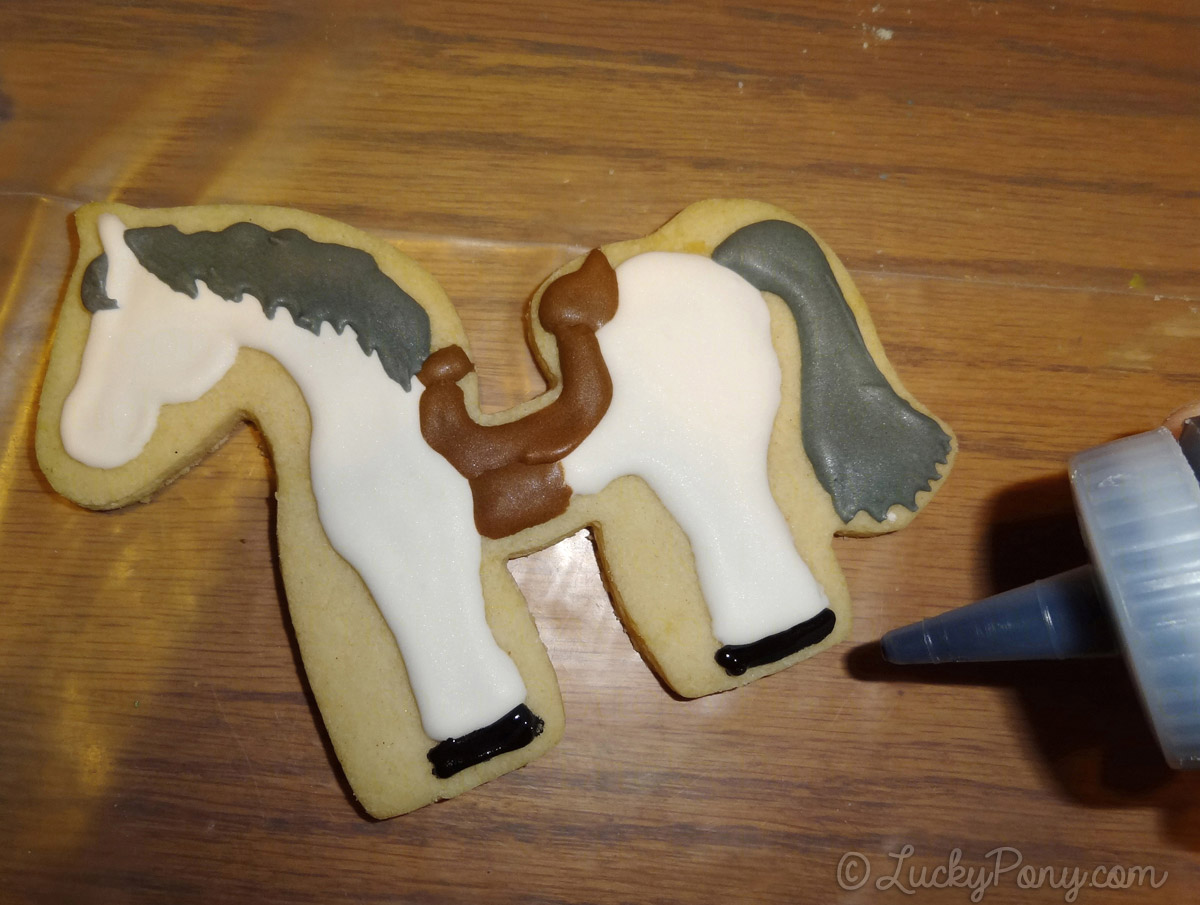
On my white horses, I did the saddle after the body coat had been applied and dried. For western horses with cowboy or cowgirl riders, decorate your saddle to have square shaped flaps.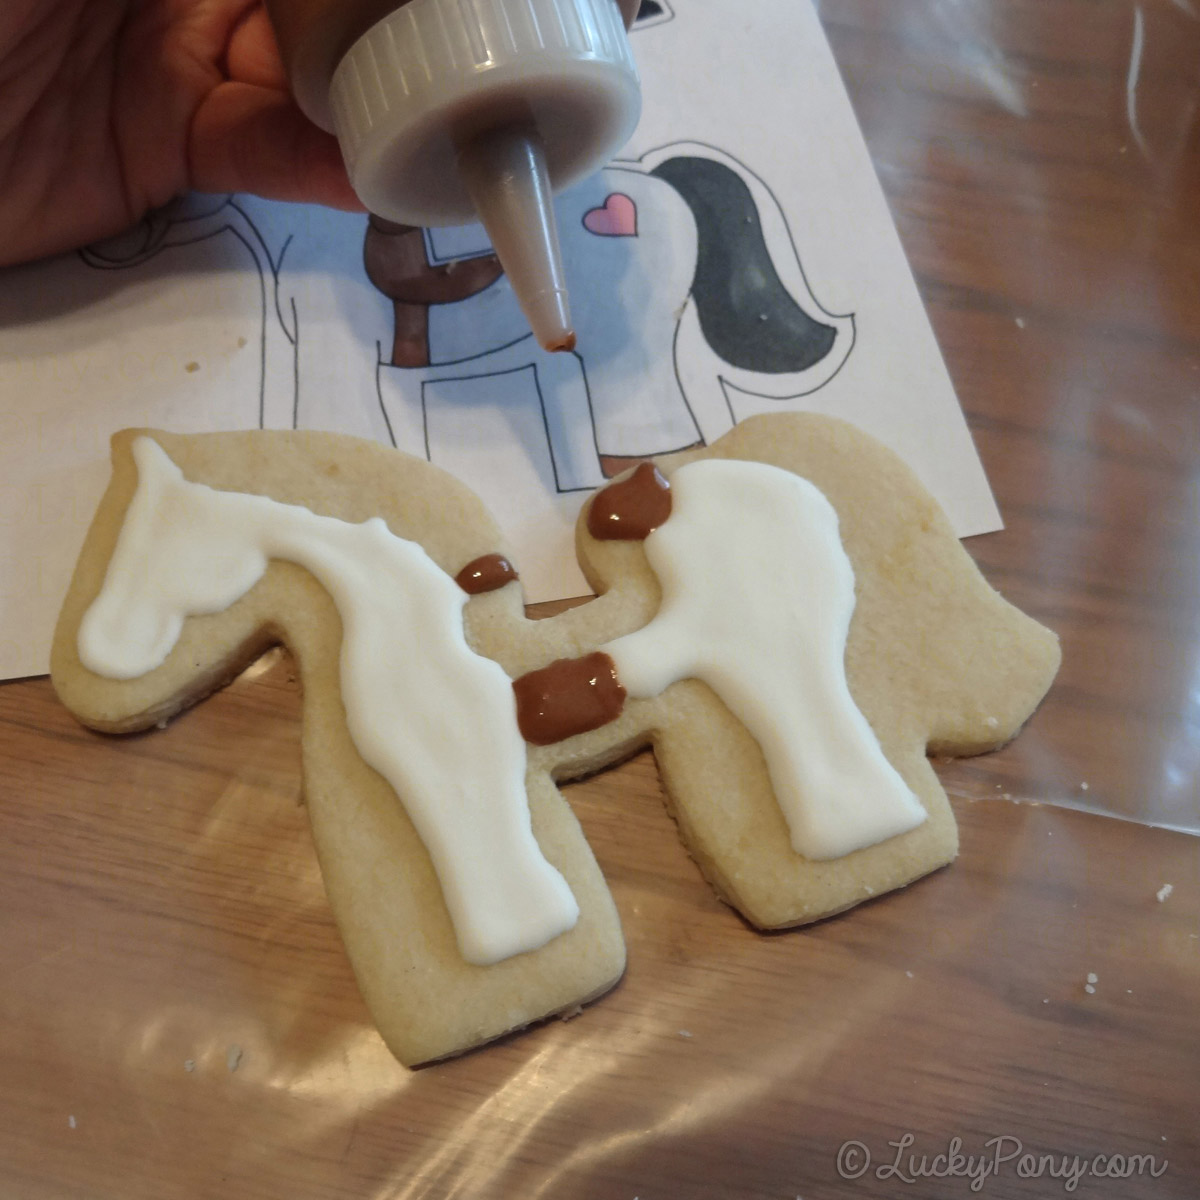
ICING THE BODY:
Because it’s important for this cookie to be strong enough to stand vertically, the shape of the cutter is somewhat bulky. This gives a finished cookie strength but can make the horse look a bit strange if iced along the outline. To remedy this I made sure to ice in the contours and leave the blank spaces drawn on my template.
Instead of a basic outline, I found it helpful to break the horse’s body into shapes. This helped me visualize where I was at in the shape and also helped give the horse the distinctive curves and contours of a horse shape.
To start: a half circle at the cheek, another for the muzzle, and a straight line up the face:
Next, a half circle at the shoulder, a half-heart for the rear, and a gentle curve for the stifle (that’s the front of the back thigh, for you folks who haven’t groomed a real one a few thousand times! 😉 and for the front leg.
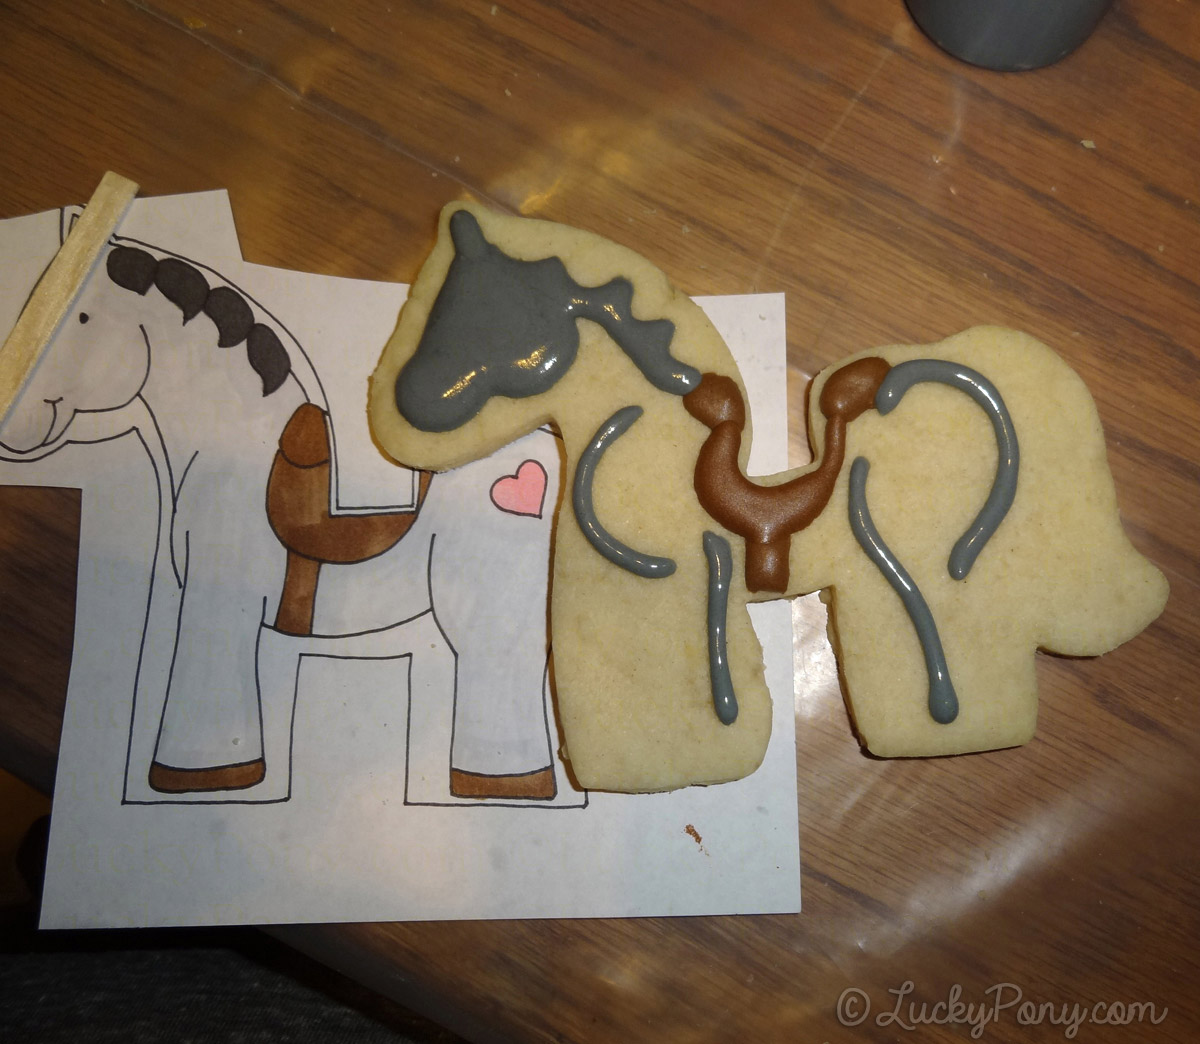
Once I have my shoulder, rear, hocks, and elbow located, I connect the curves with straight(ish) lines.
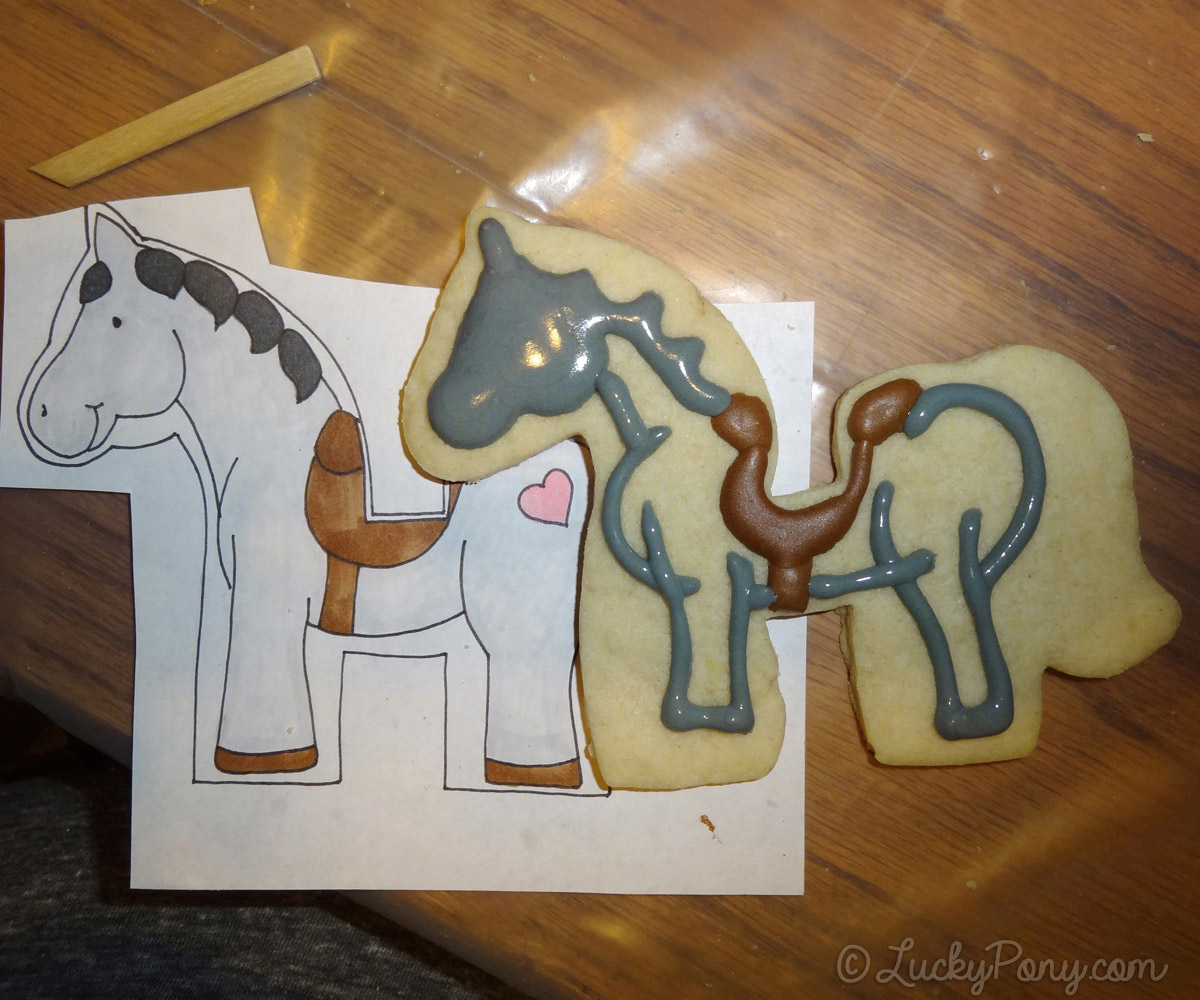
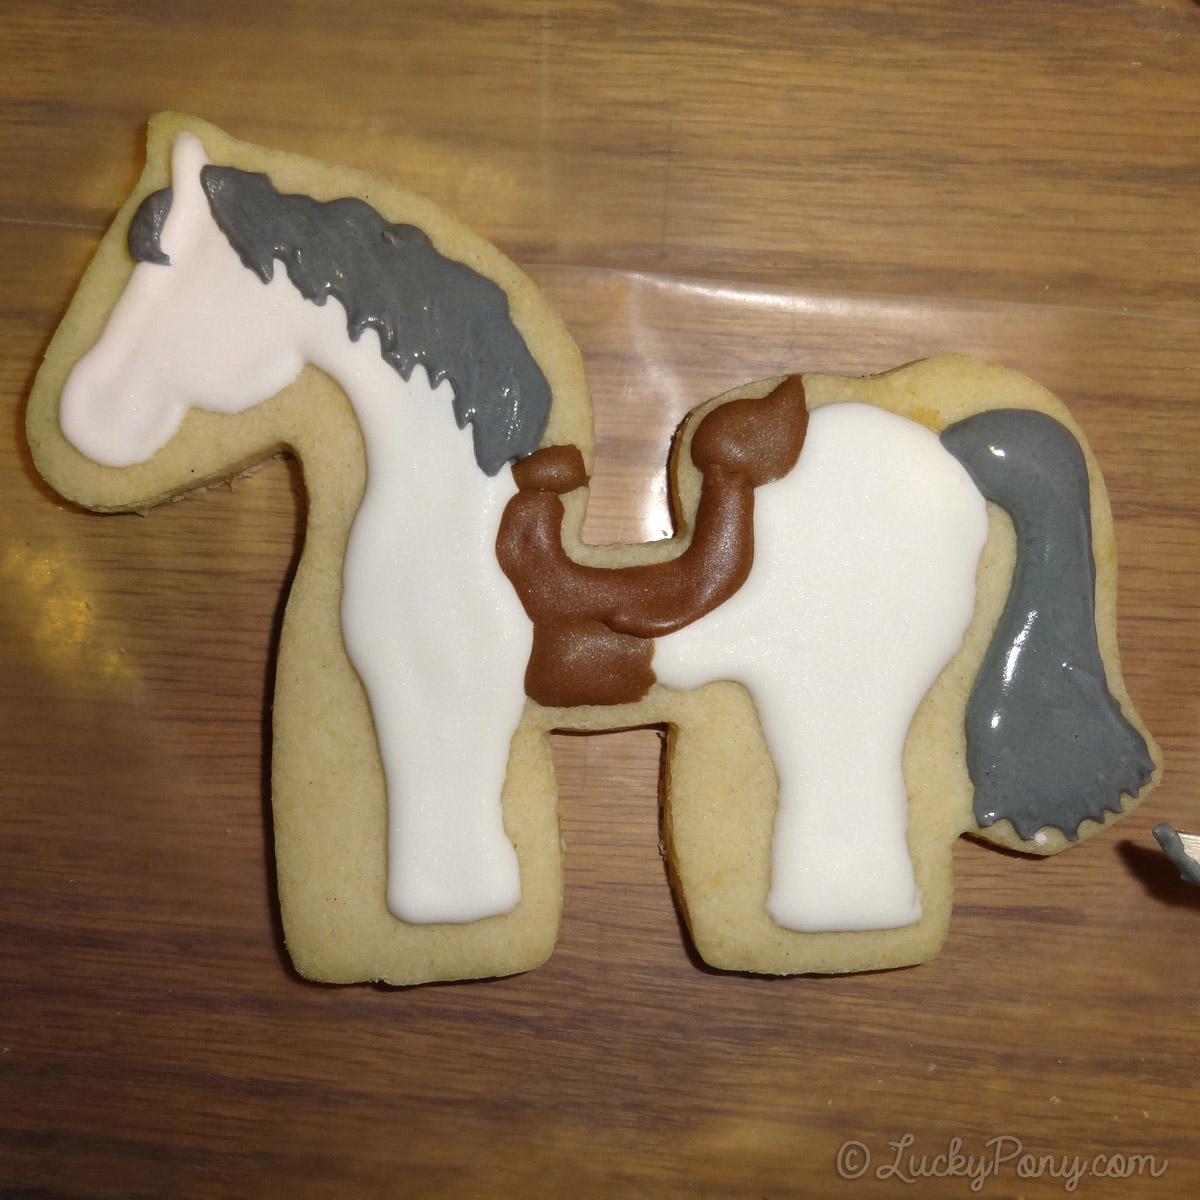
Though the exaggerated contours look odd on the outline, when filled in the horse takes shape as an adorable pony:
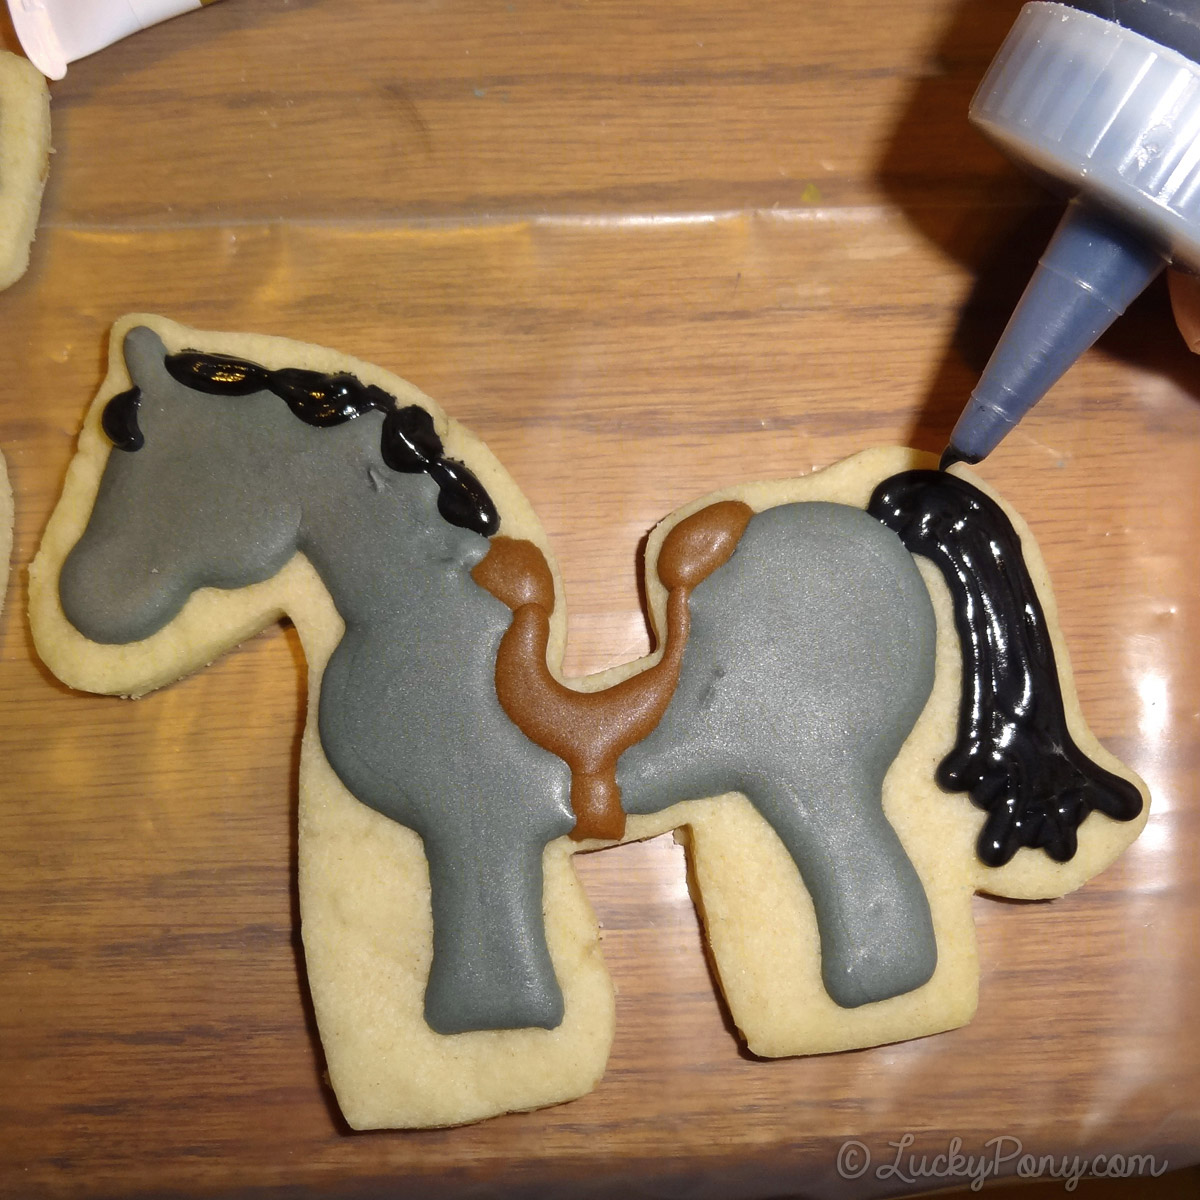
MANE AND TAIL
The mail and tail are quick and easy for these pony cookies. Plan ahead of time if you’ll do long manes, bumpy-curly manes, show braids, or cute short manes. If you are baking for a pony party, consider filling the mane and tail with plain white icing and letting your guests add the mane and tail with food coloring pens as a party activity!
To ice with a traditional method, first squeeze a few blobs onto the crest of the neck:
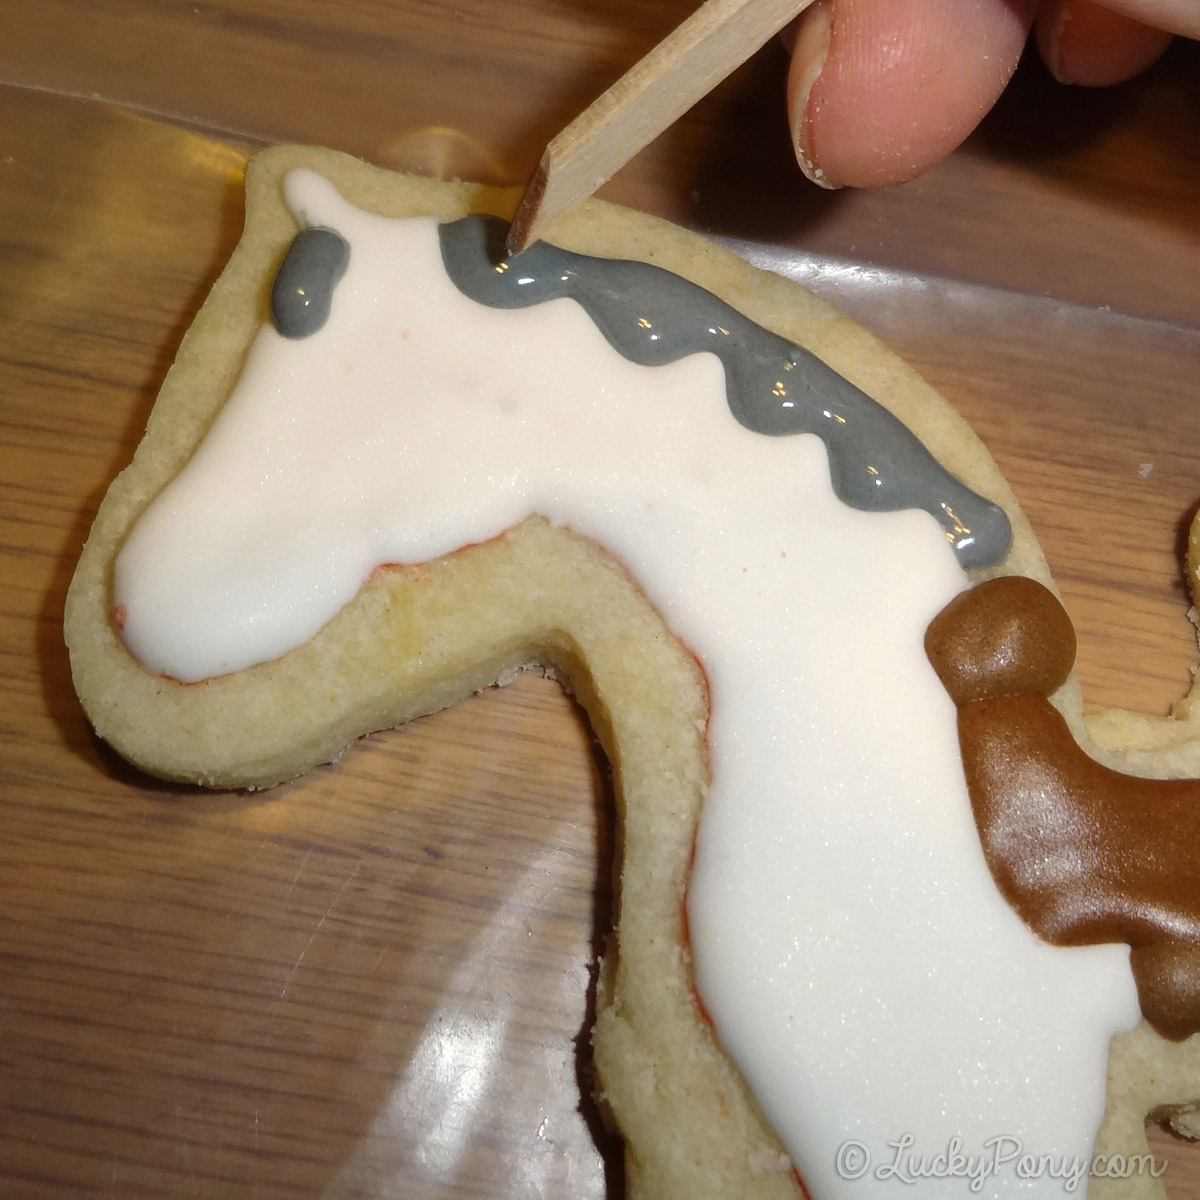
Using a craft stick or toothpick, use the tip to carefully coax the icing into points, as illustrated:
This method can be used to quickly create “clumps” of hair. Shake your cookie gently to help the peaks of icing left by your tool to settle back down into the icing.
The same dip-and-drag method works to create a perfectly fringed hunter-jumper style horse tail:
HOOVES:
At any point after the icing on the legs is dry, add a small rectangle at the bottom of each leg as a hoof:
OPTIONAL: ADDING HEARTS
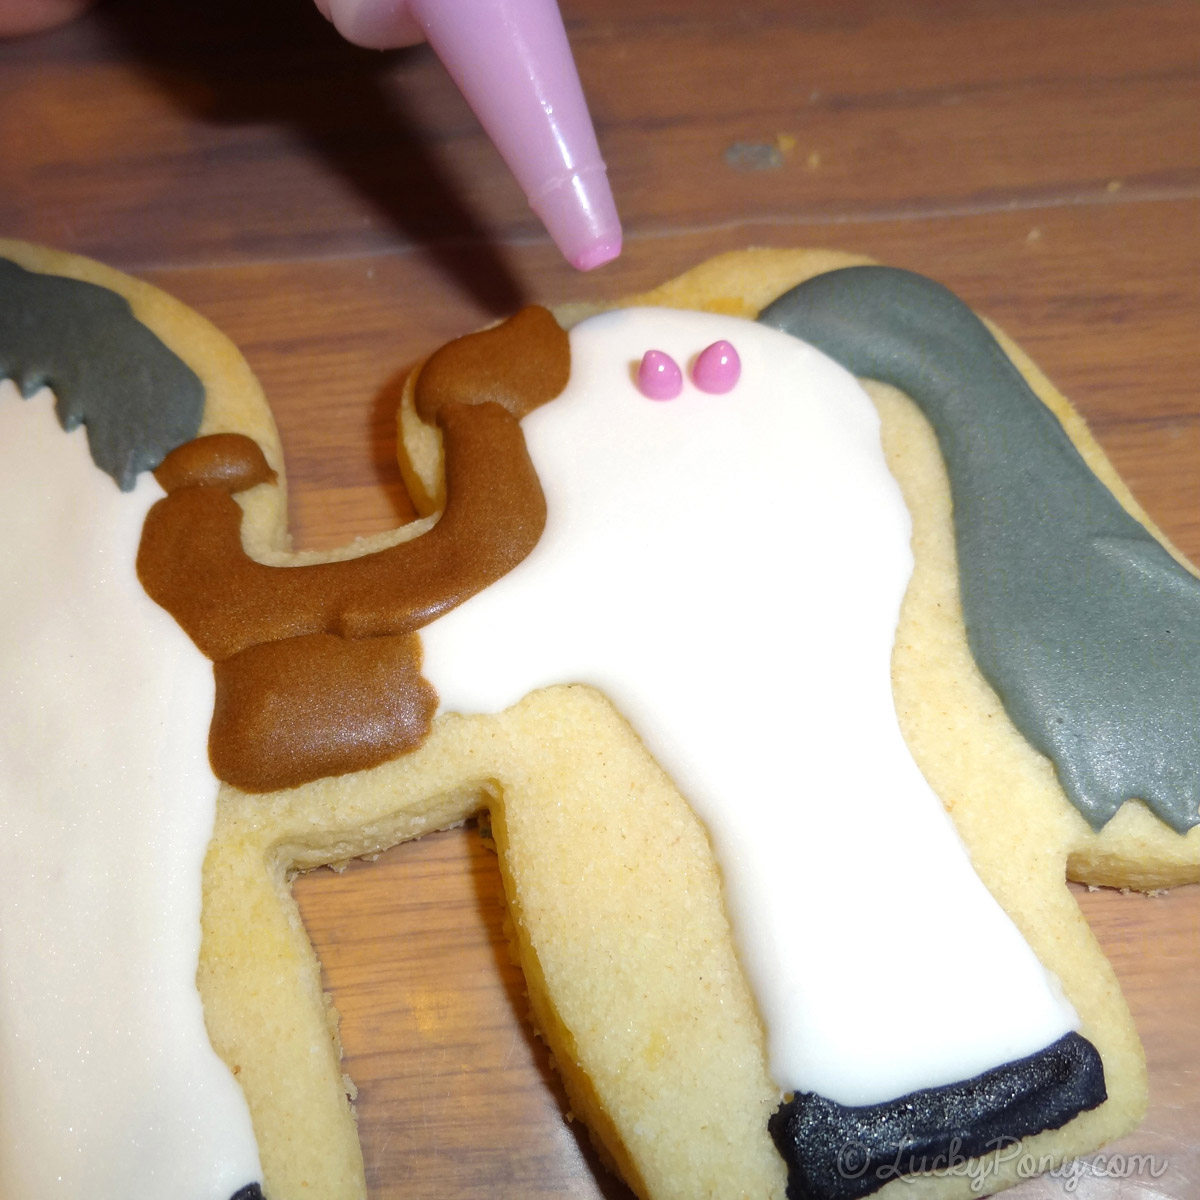
I thought these sweet ponies needed a bit of extra adorableness – or perhaps I’m still under the influence of the 1980’s era My Little Ponies and think that rear decorations should absolutely be a part of everyday horse grooming! In either case, adding a perfect little heart is incredibly easy!
Just drop two equally sized dots of icing on the rear:
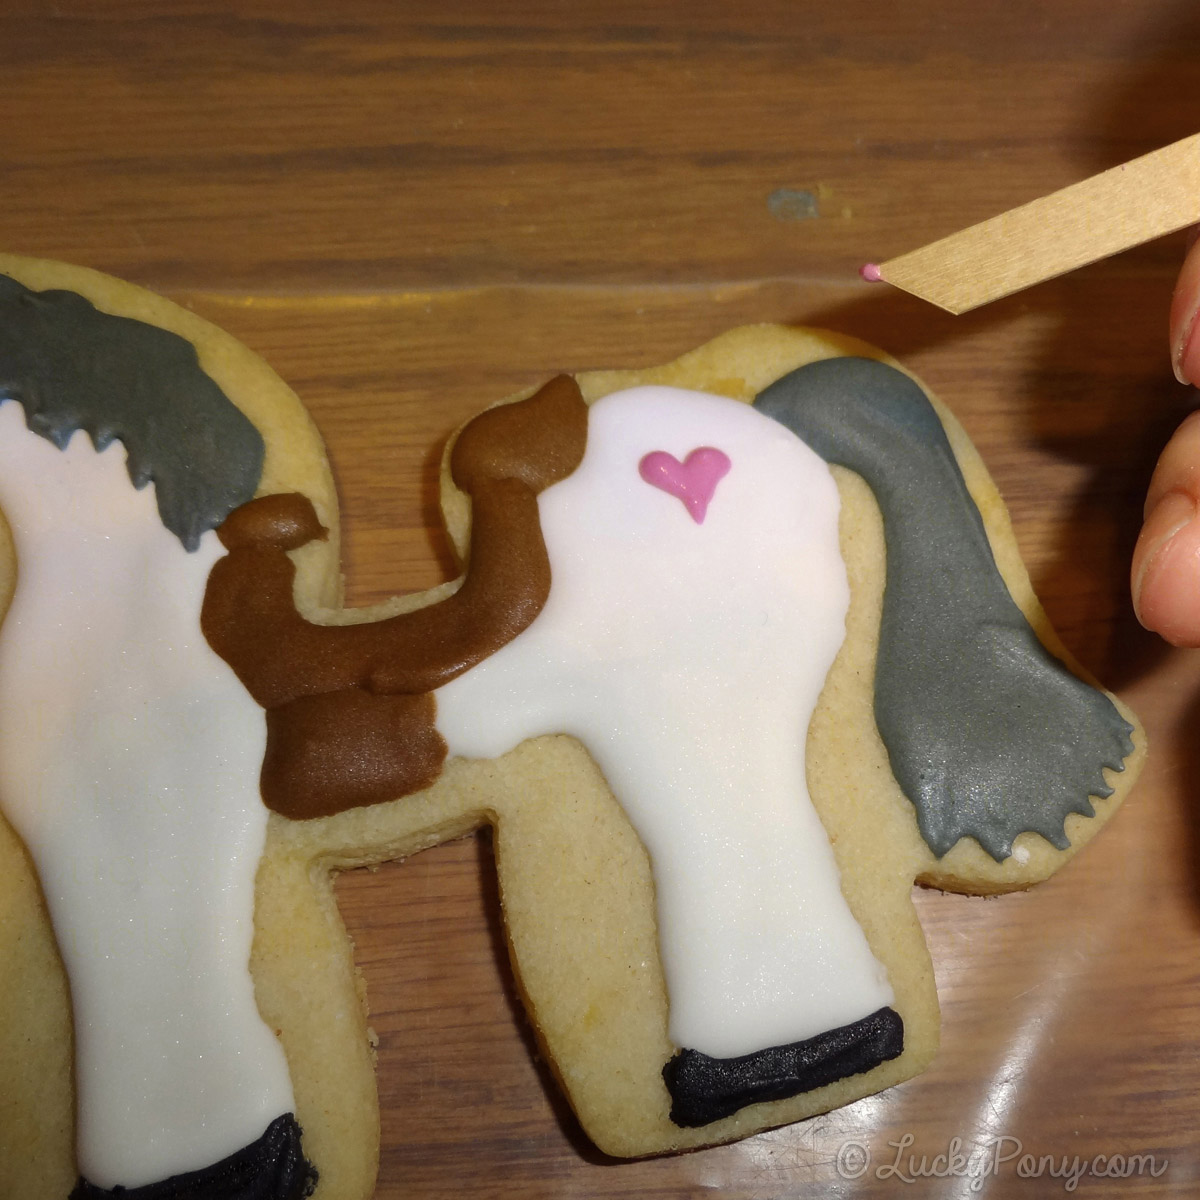
Use a toothpick to drag each dot of icing down and towards each other:
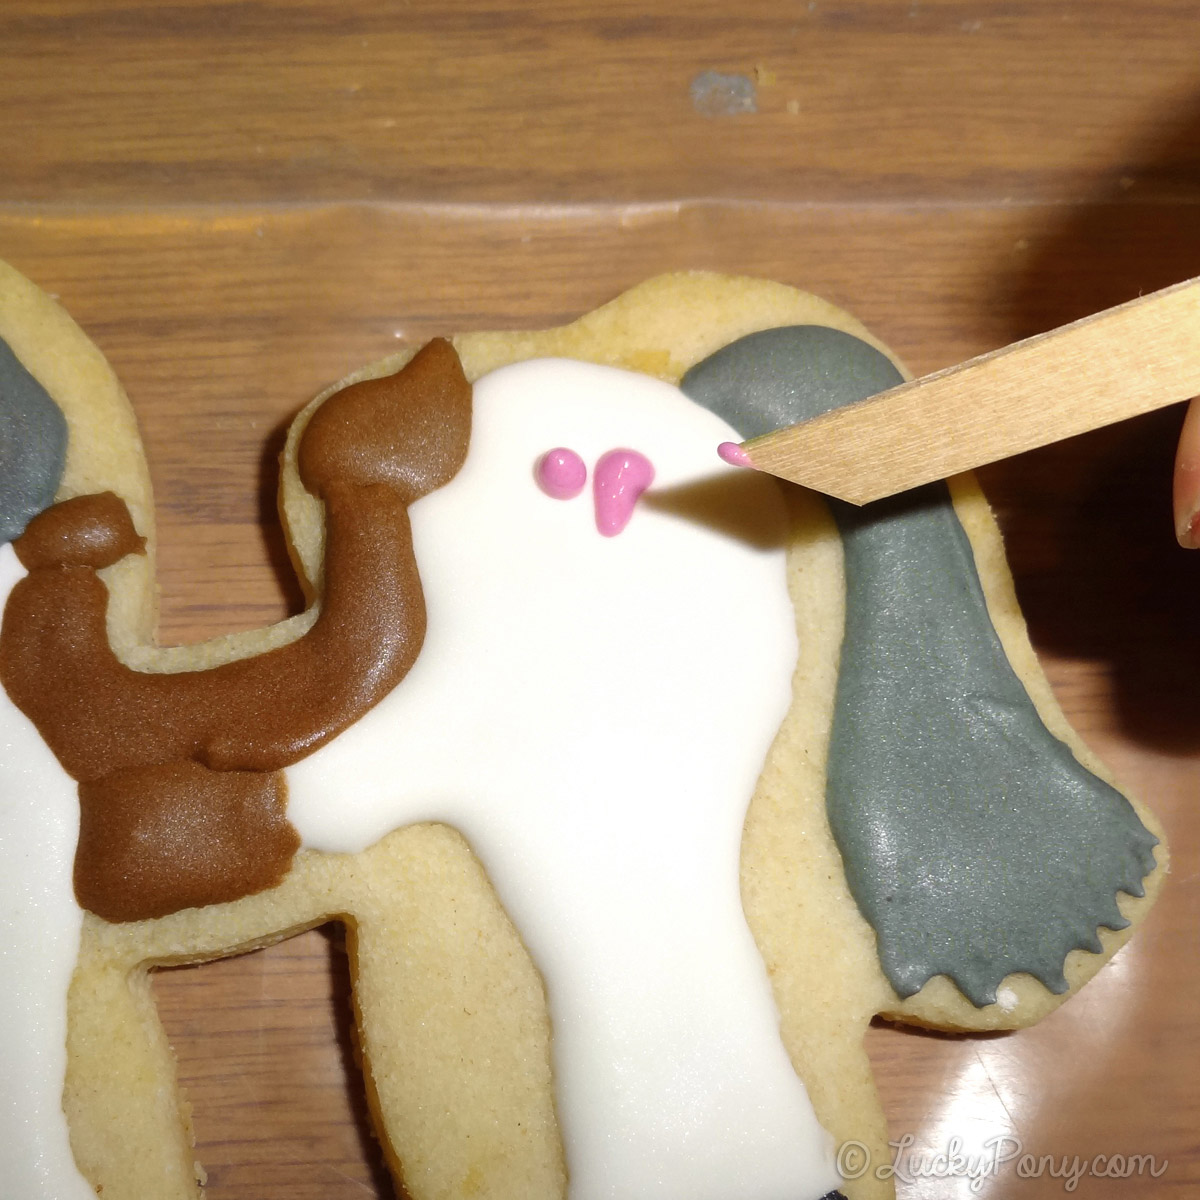
…Creating a perfect heart! You may want to practice this method on a piece of paper a few times- but it’s easy to pick up!
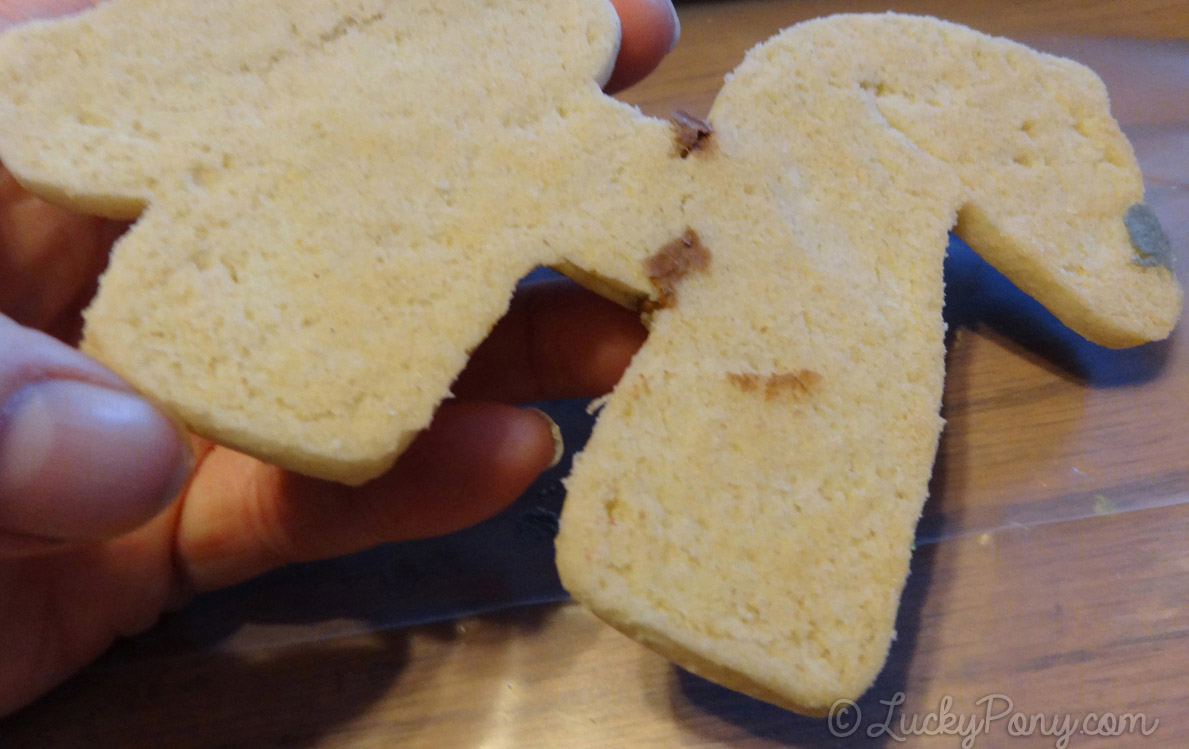
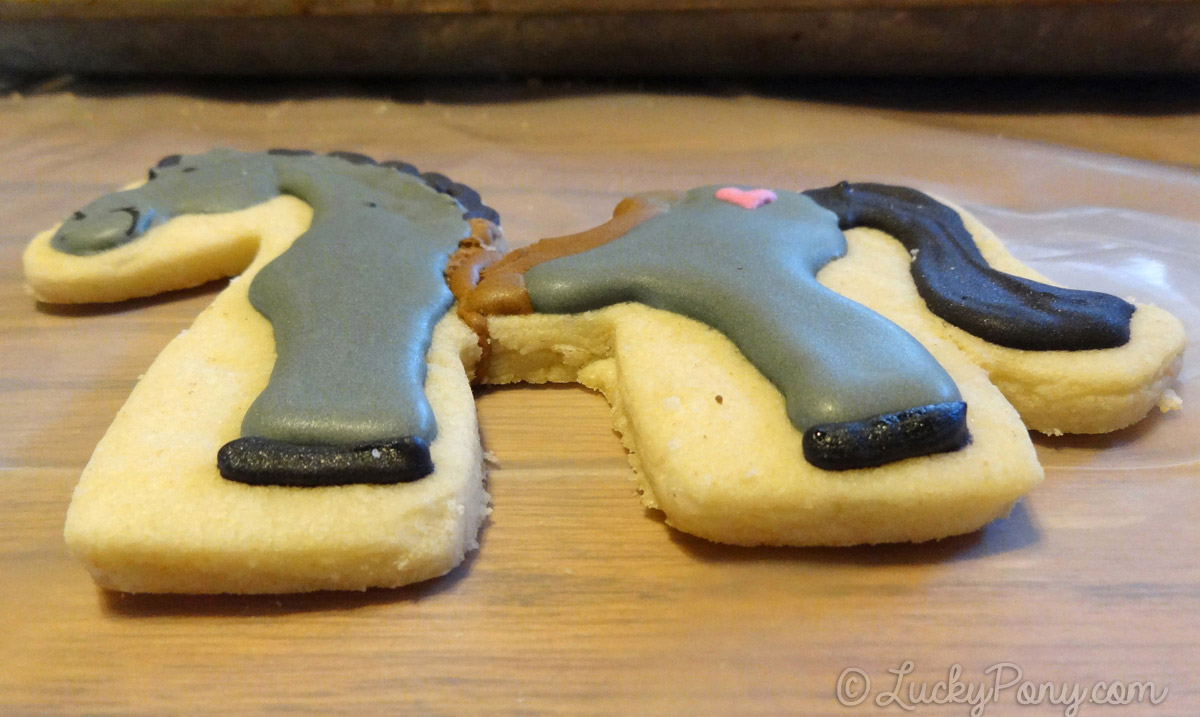
REPAIRING BROKEN COOKIES
If you roll your dough to 1/4″ thick as recommended, you shouldn’t have too much breakage- however any cookie with two large sides joined by a smaller section is more likely to break. Luckily, it’s actually pretty easy to salvage broken cookies. Just apply icing heavily to the broken edges, like glue, and press them together. Wipe away excess glue.┬á Let the cookie sit on a non stick surface overnight and when the icing hardens, in the morning, your cookie will be nearly as strong as ever.
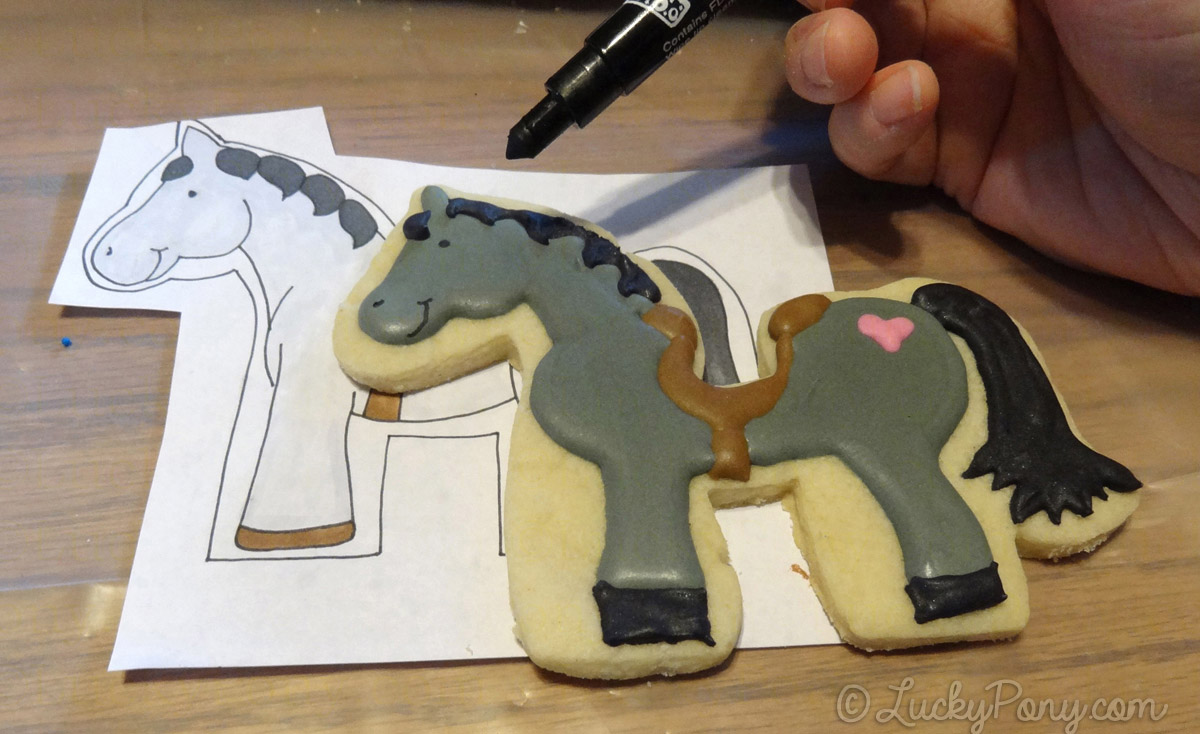
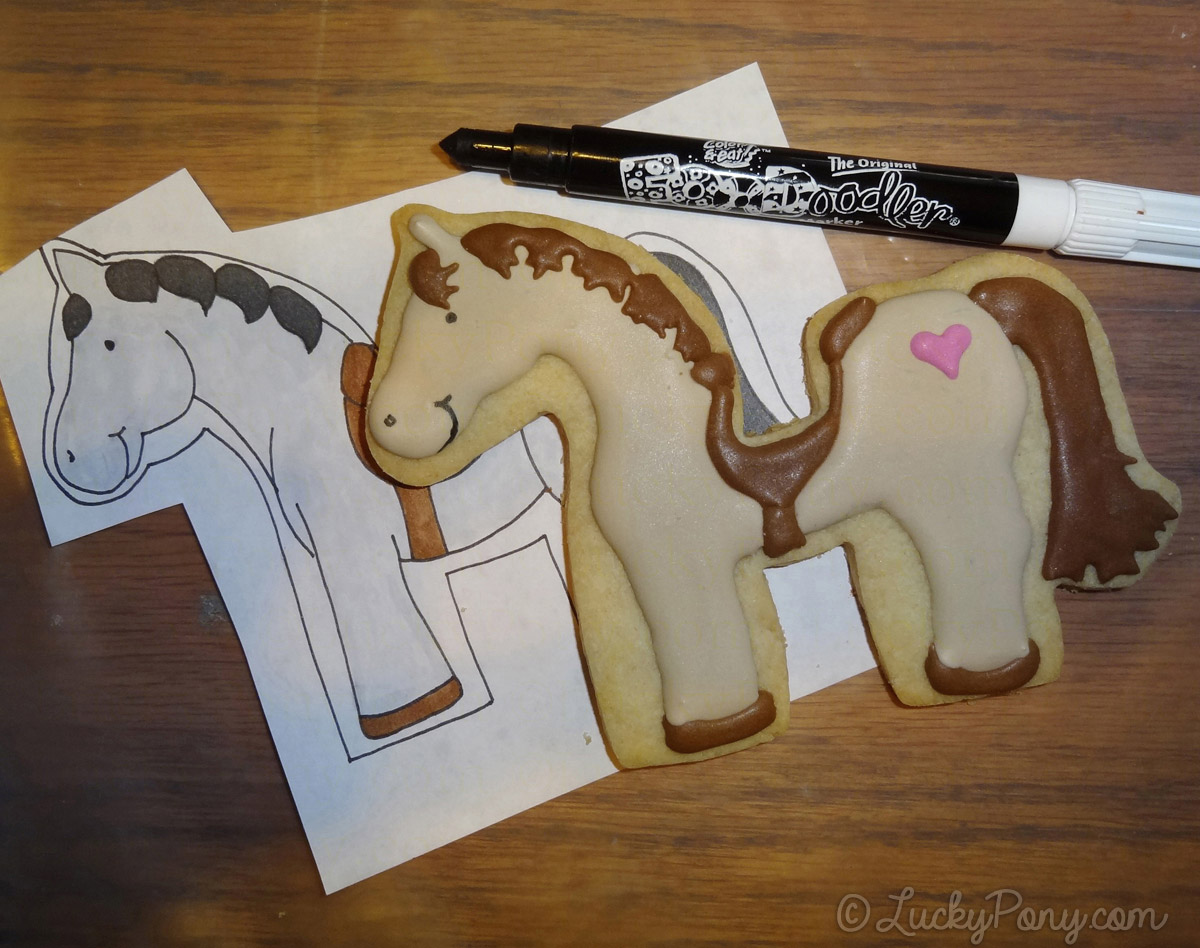
ADDING DETAILS AND PERSONALITY:
What really brings these cookies to life is the expression and character added by a mouth, nose, and eyes. You can use black icing, but will have better results if using a Black Food Coloring Marker.
Use the marker on completely dried icing to add facial features and black markings like appaloosa spots or paint horse patterns:

Cowgirl cookie astride her cookie steed with spots added with a food coloring pen:

I’d love to know how YOUR cookies turn out! Post a comment about your adventures decorating the horse and rider cookie cutter.
Leave a Reply