
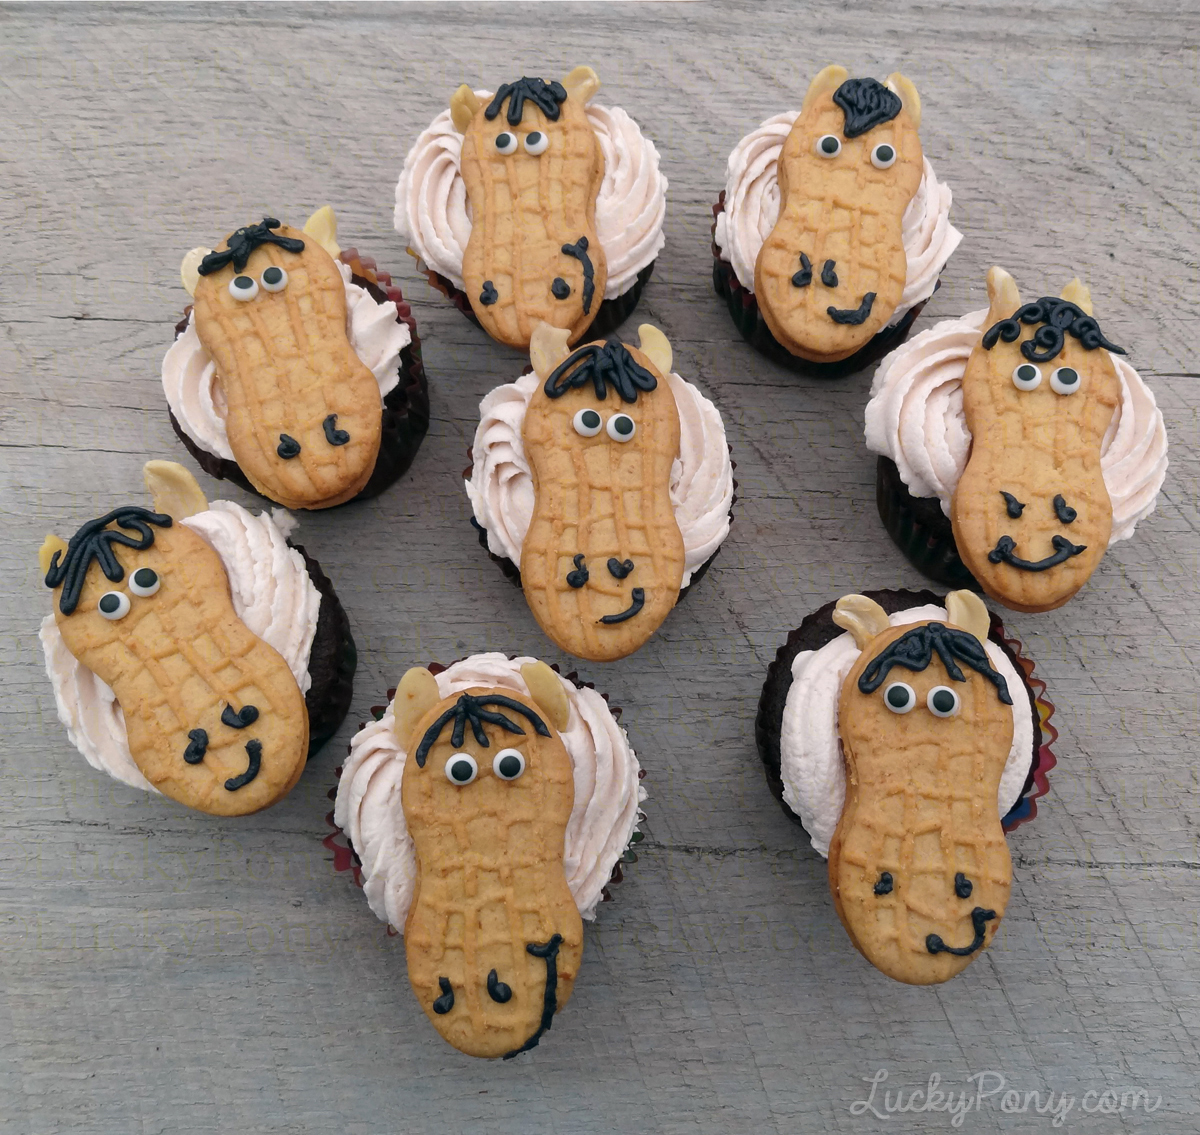
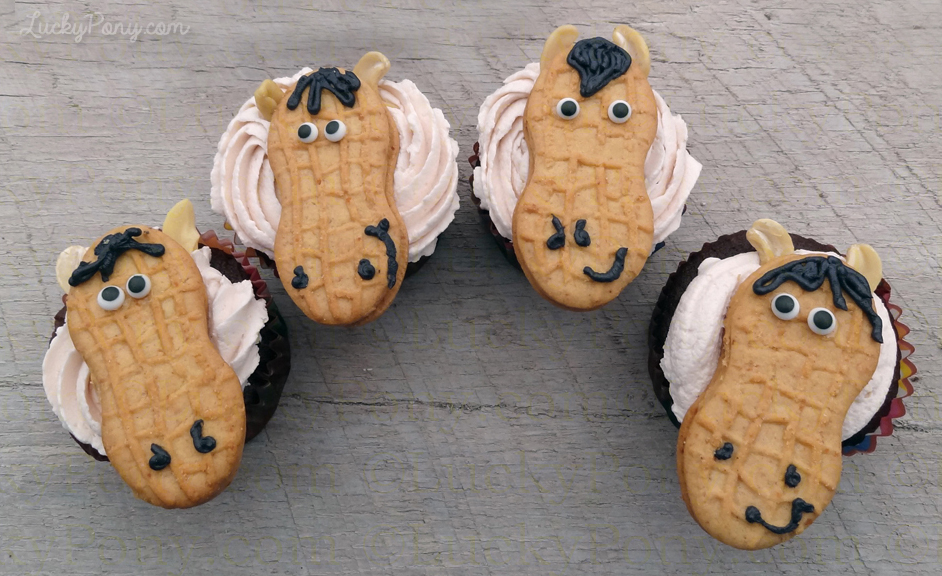
Pony paint and horse cookie cutters are popular party activities for horse themed birthday parties- but what if you are looking for lots of horse-themed-fun without a big mess to clean up? These horse cupcakes take the prize for being FAST and easy. Made with premade ingredients, these cupcakes come together in moments with a homemade factor that no big-box store cupcakes can match!
Though they require a bit of supply-gathering, these cupcakes are fun to make ahead and use as a centerpiece, or you can decorate a few examples and save the decorating for a kid-friendly hands-on party activity.
There are many types of prepackaged icing available now, the ONLY kind I’ve tried that will hold the detail needed for this project is this one.
Items you’ll need:
1 batch cupcakes (homemade or plain iced cupcakes from bakery.)
If you make your own cupcakes, reserve 3/4 cup icing for last step.
1 large package Nutter Butter Cookies
1 small package of Cashew Halves
1 package 1/4│ pre-made Icing Eyeballs
1 tube clear decorating gel
and either black butter cream icing (made from your reserved cupcake frosting) OR 1 tube of wiltons ready-to-go Wilton Black Decorating Icing Tube
(NOT cookie icing, as cookie icing is way too runny) OR an AmeriColor Black Food Coloring Marker
(a medium-tip black marker that will allow you to draw details on your cookies)
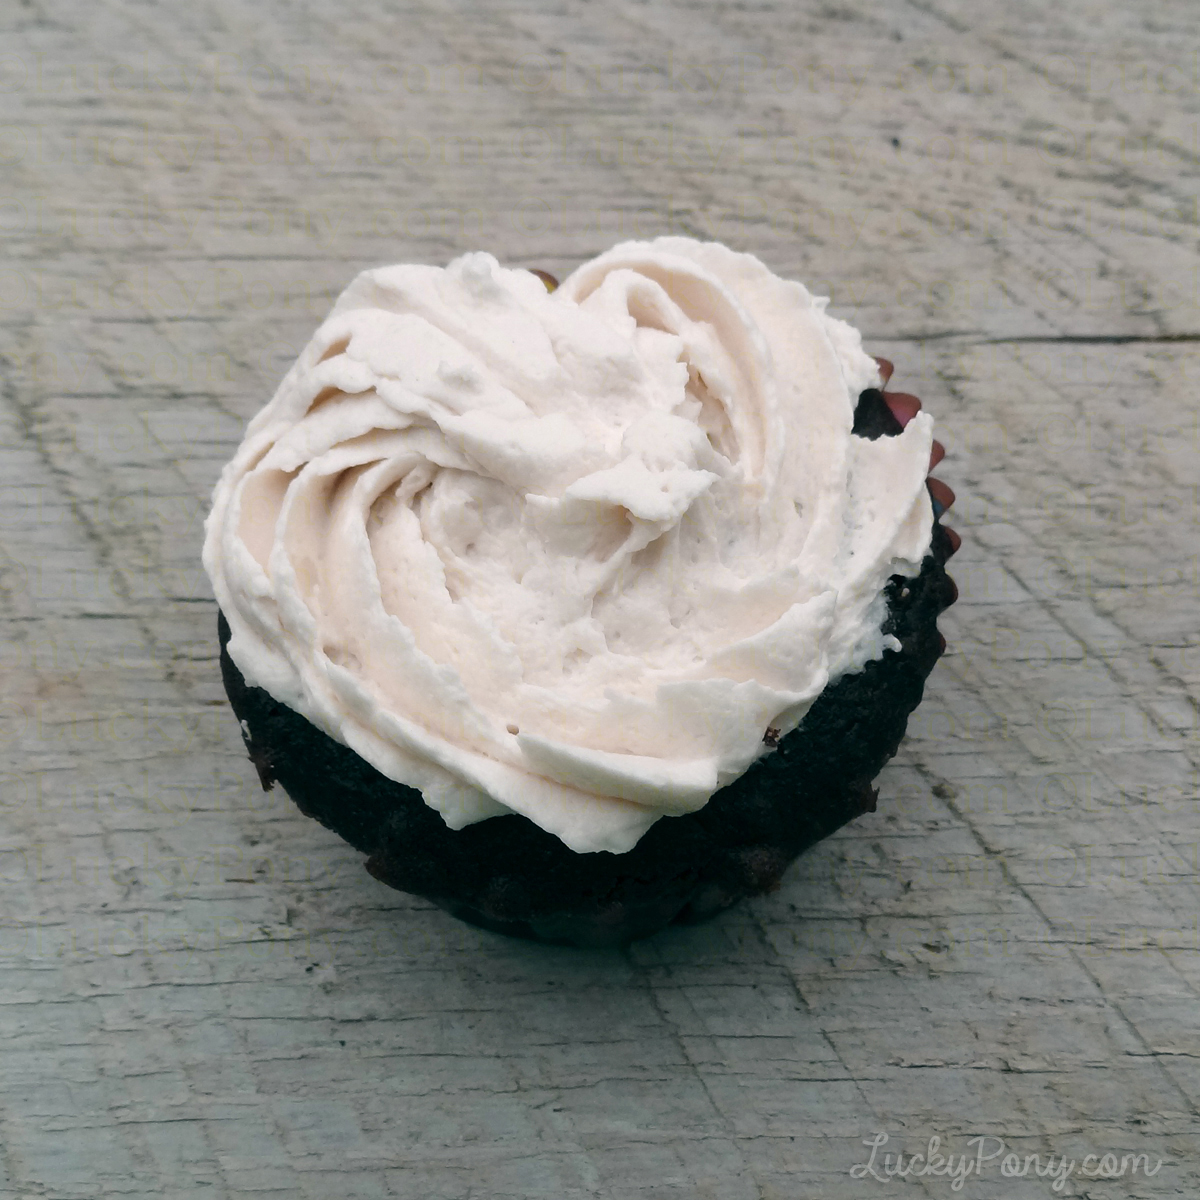
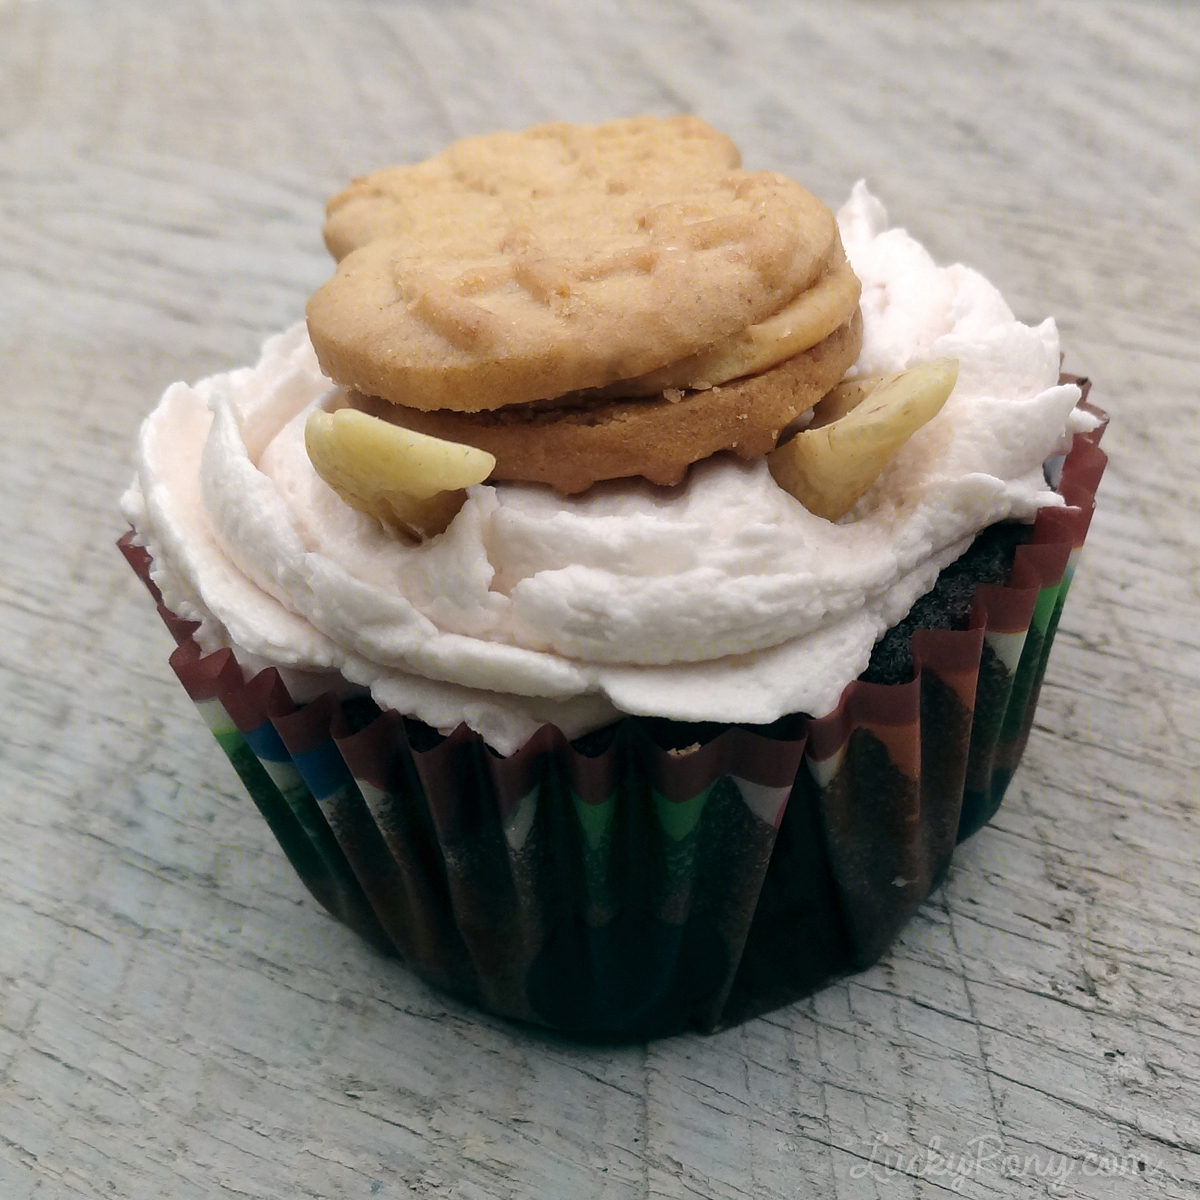
If you are frosting your own cookies, a simple swirl or heart shaped coil should work great. If you are using store-bought cupcakes with very lofty frosting, you may want to scrape some of the icing off and smooth the surface with a knife:
Step 1.
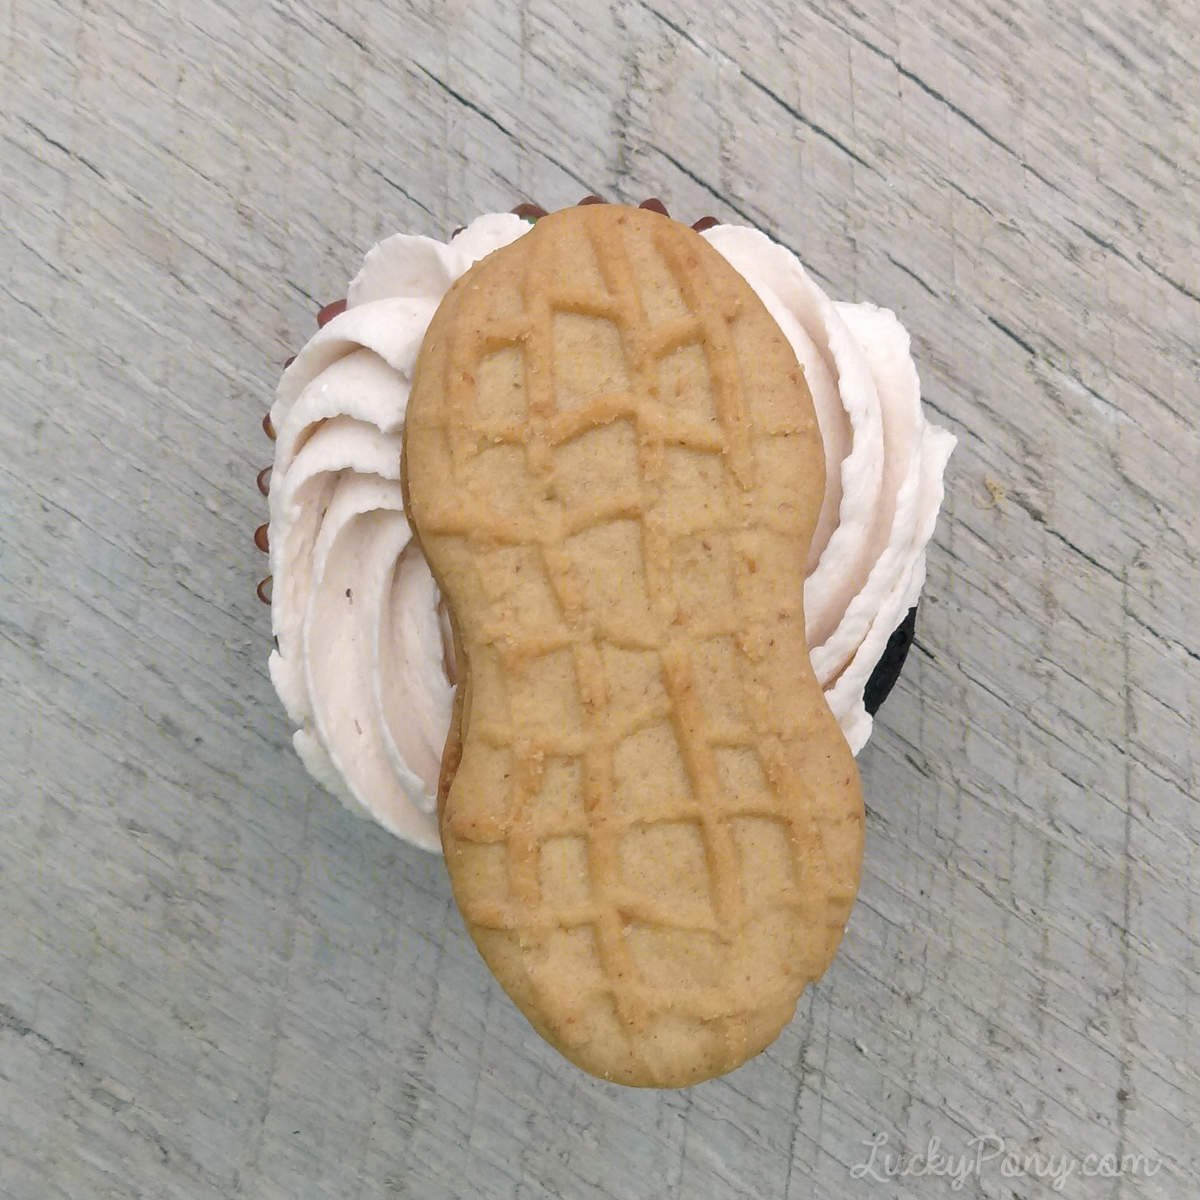
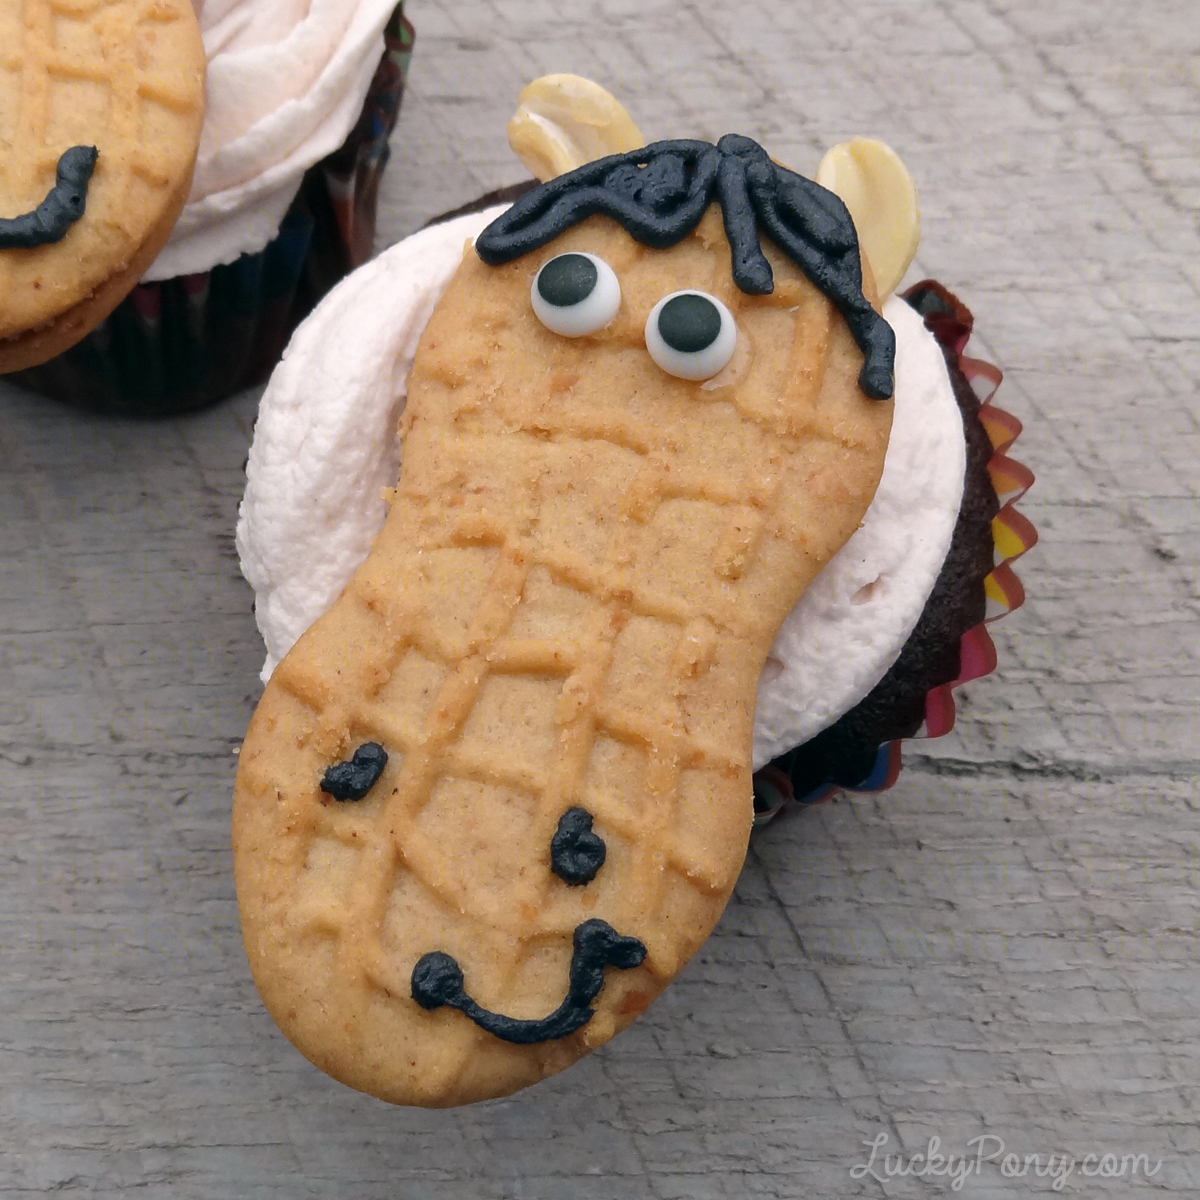
Press a cookie into the frosting of the cupcake, firmly until held in place by icing. If you’ve purchased cookies and your icing feels dry, use the Clear Decorating Gel to glue your cookies to the surface of the cupcake. Position your cookie so that one end extends off the top of the cupcake, leaving enough surface space on the other end to attach ears in the next step.
Step 2.
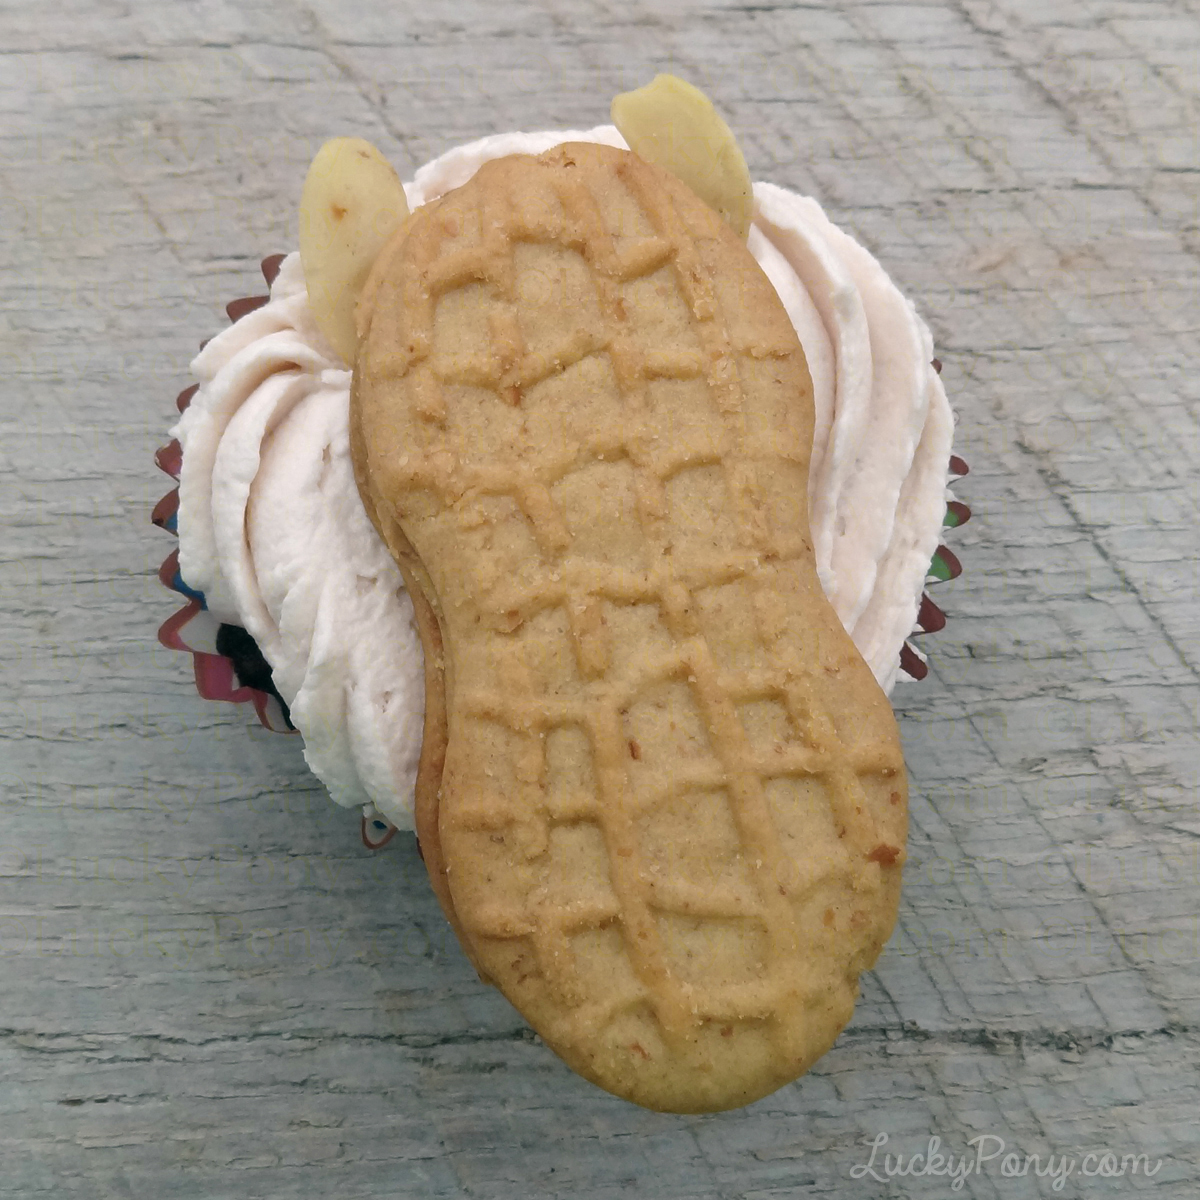
Pick through your cashews and select halves that somewhat match each other, and press into the icing around the top of your soon-to-be-horses head. Again, if your icing isn’t sticky use clear gel to attach. Slices or halved almonds could also work for ears, but I love the contour of the cashew ears!
Step 3.
Icing eyes are sheets of eyeballs made from dried royal icing. Eyeballs are incredibly hard to create with icing, so these premade ones make giving your ponies personality a cinch (and may I confess, I enjoy adding sugar googly eyes to all kinds of food! ha!)
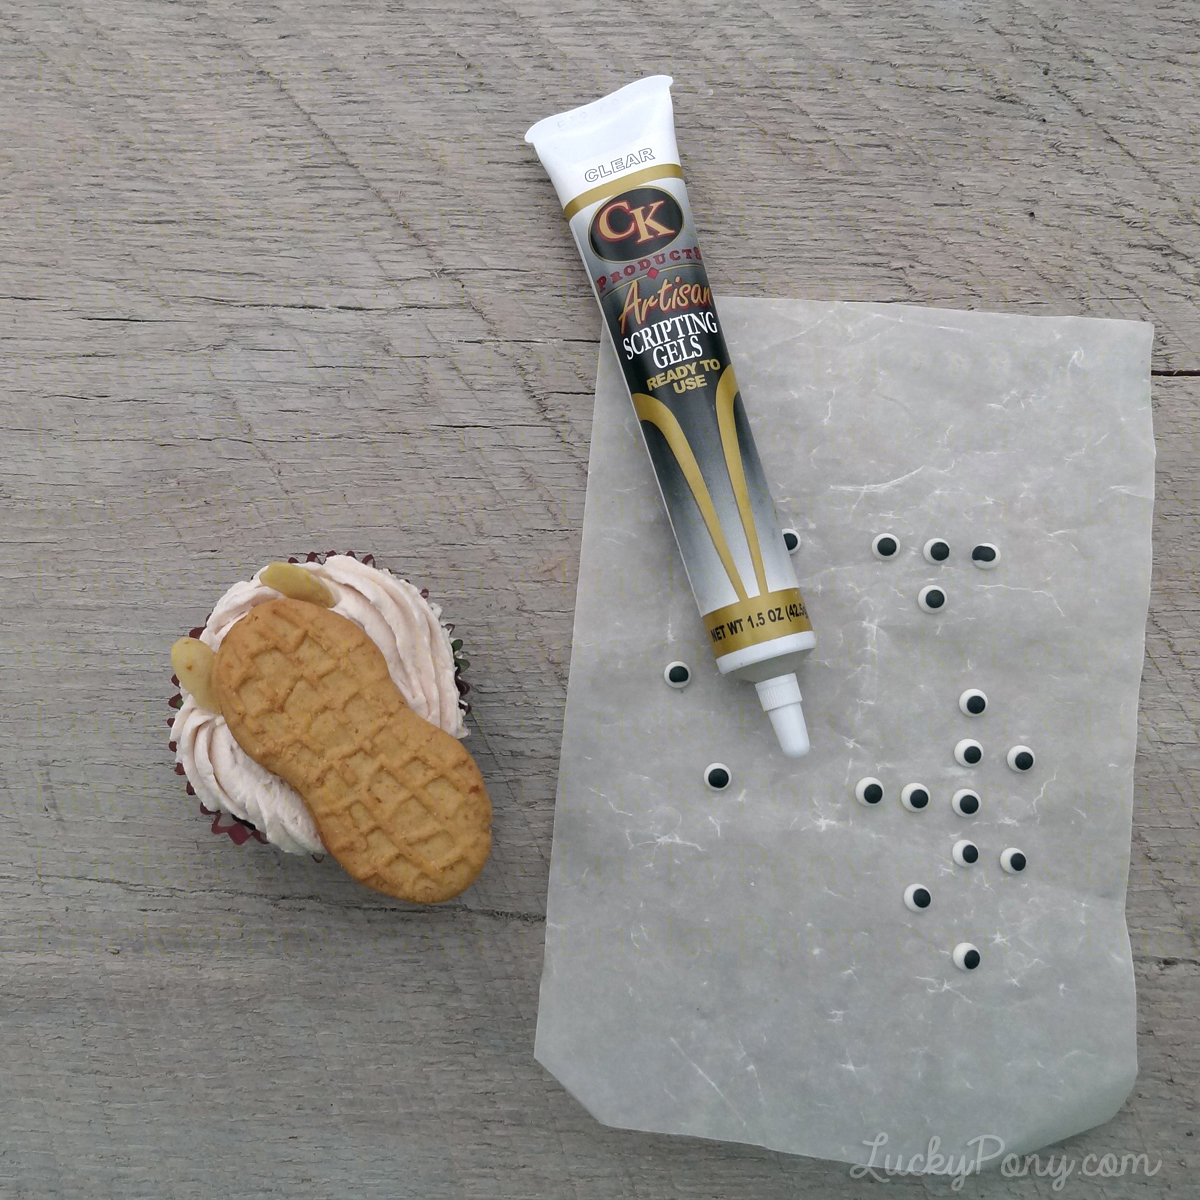
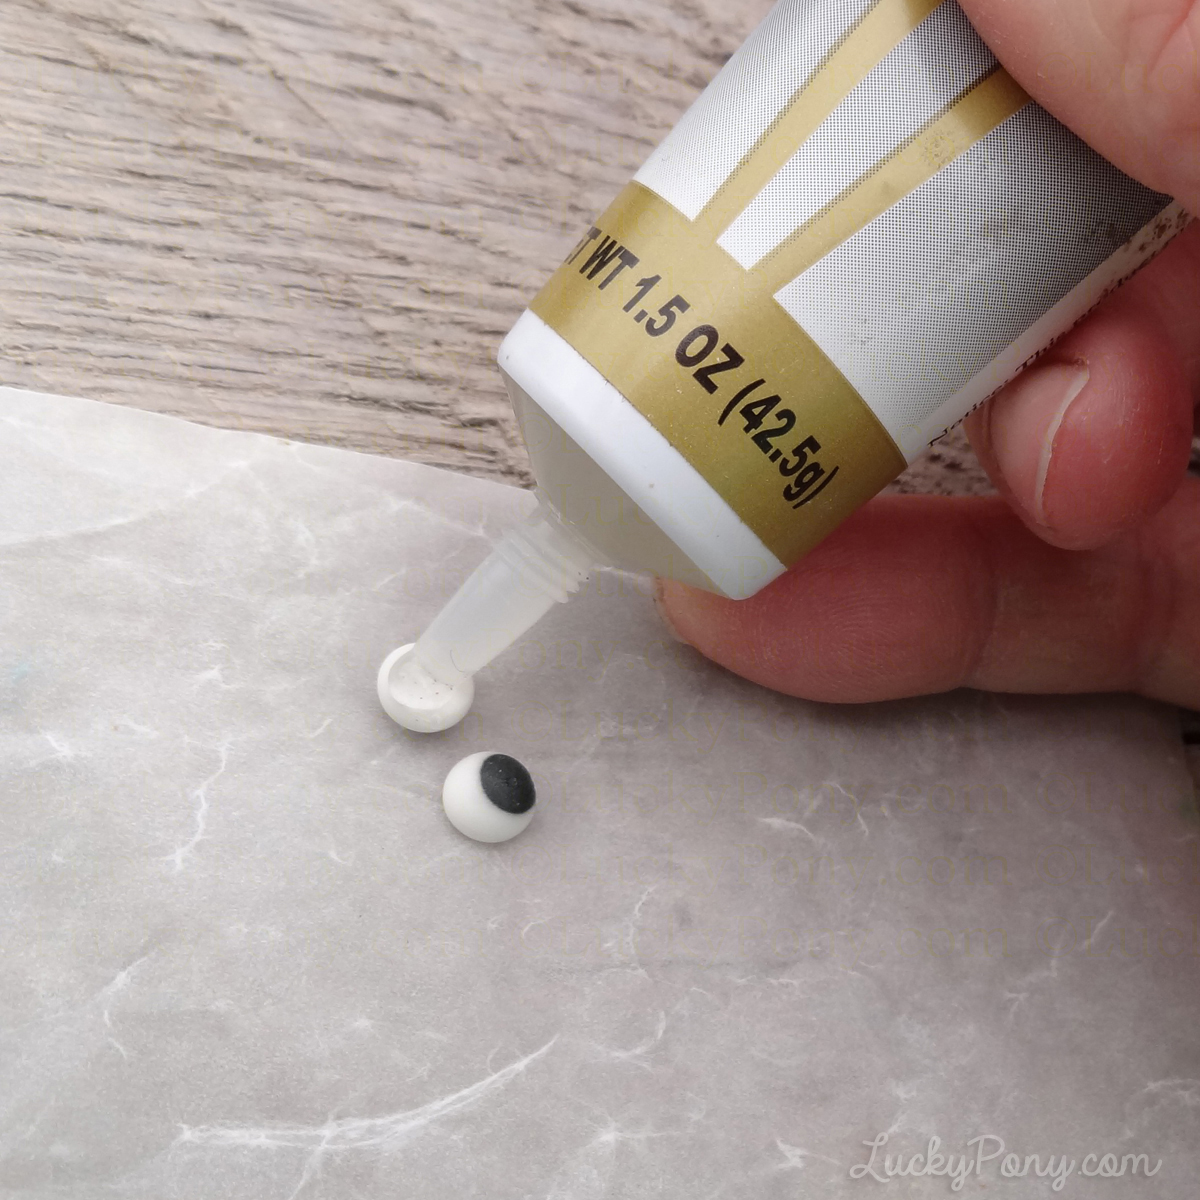
Attach icing eyes by using a VERY small drop of clear gel to the back of each. Avoid over-applying clear gel or pressing down too hard, as either can make gel ooze out around the eyeball.
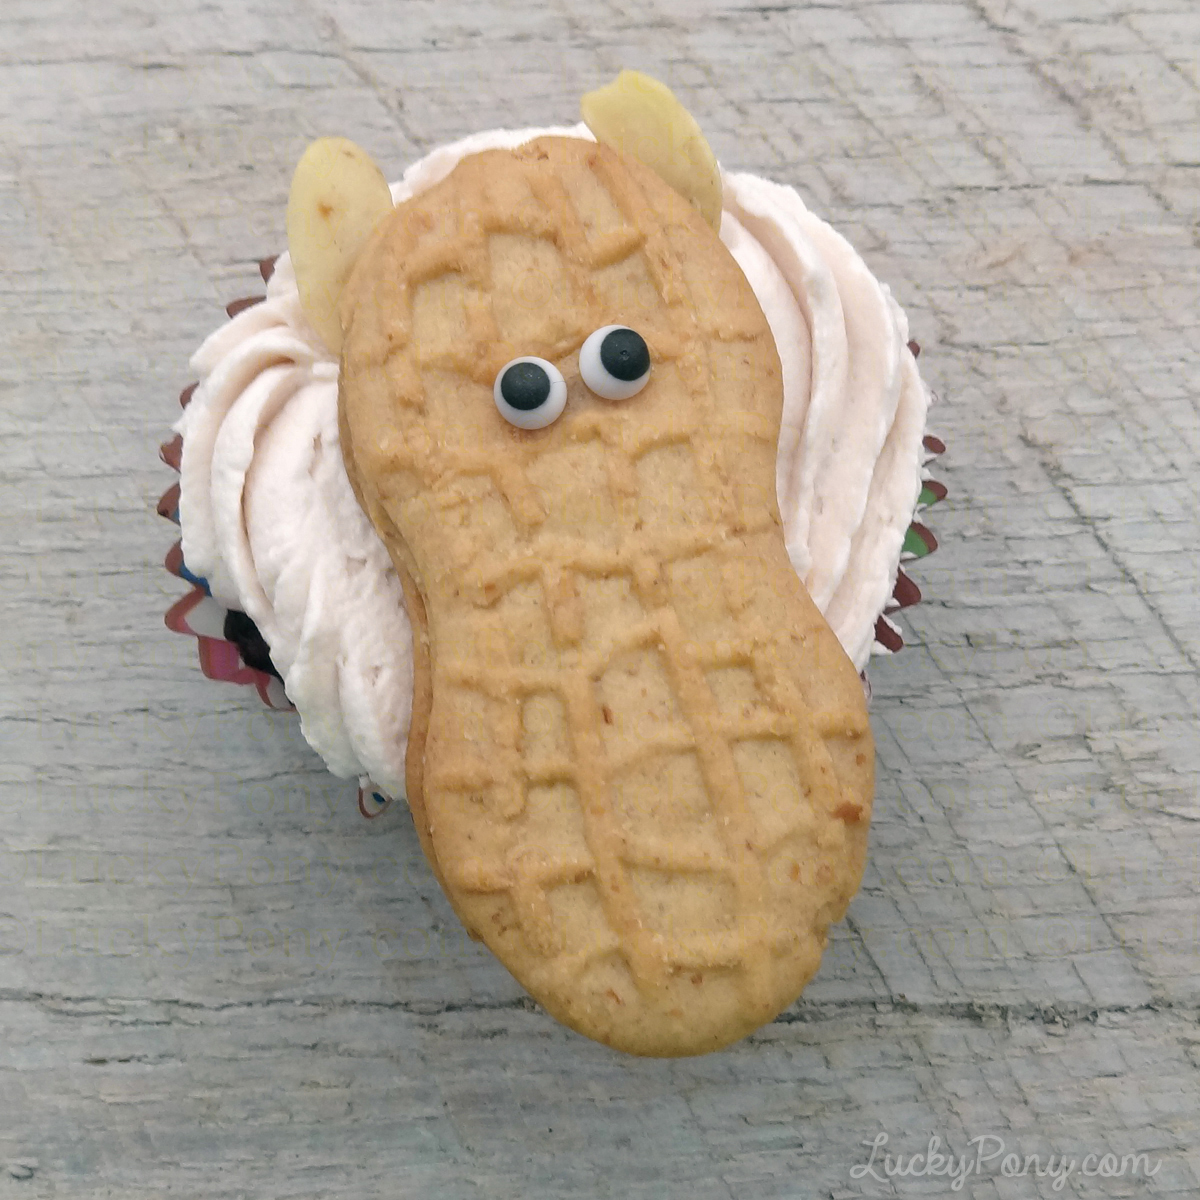
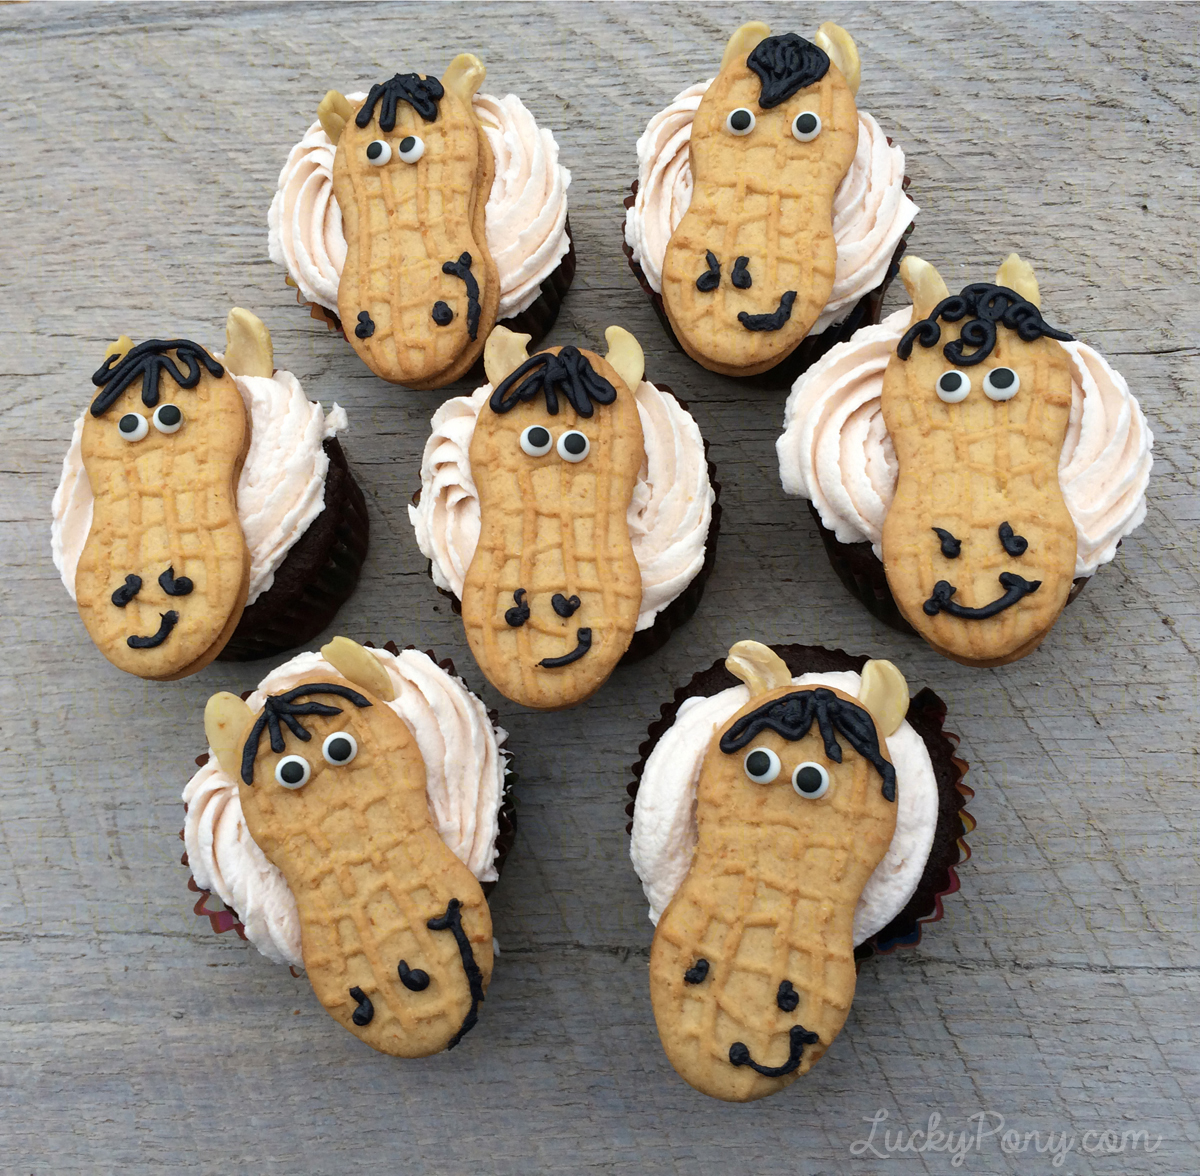
Icing eyes always vary a little, so I think it’s fun to pick eyes that match, or seem to be looking in the same direction and pair them up. Match off-center eyes with ears pointing the same direction for a cute, distracted-looking pony.
Step 4.
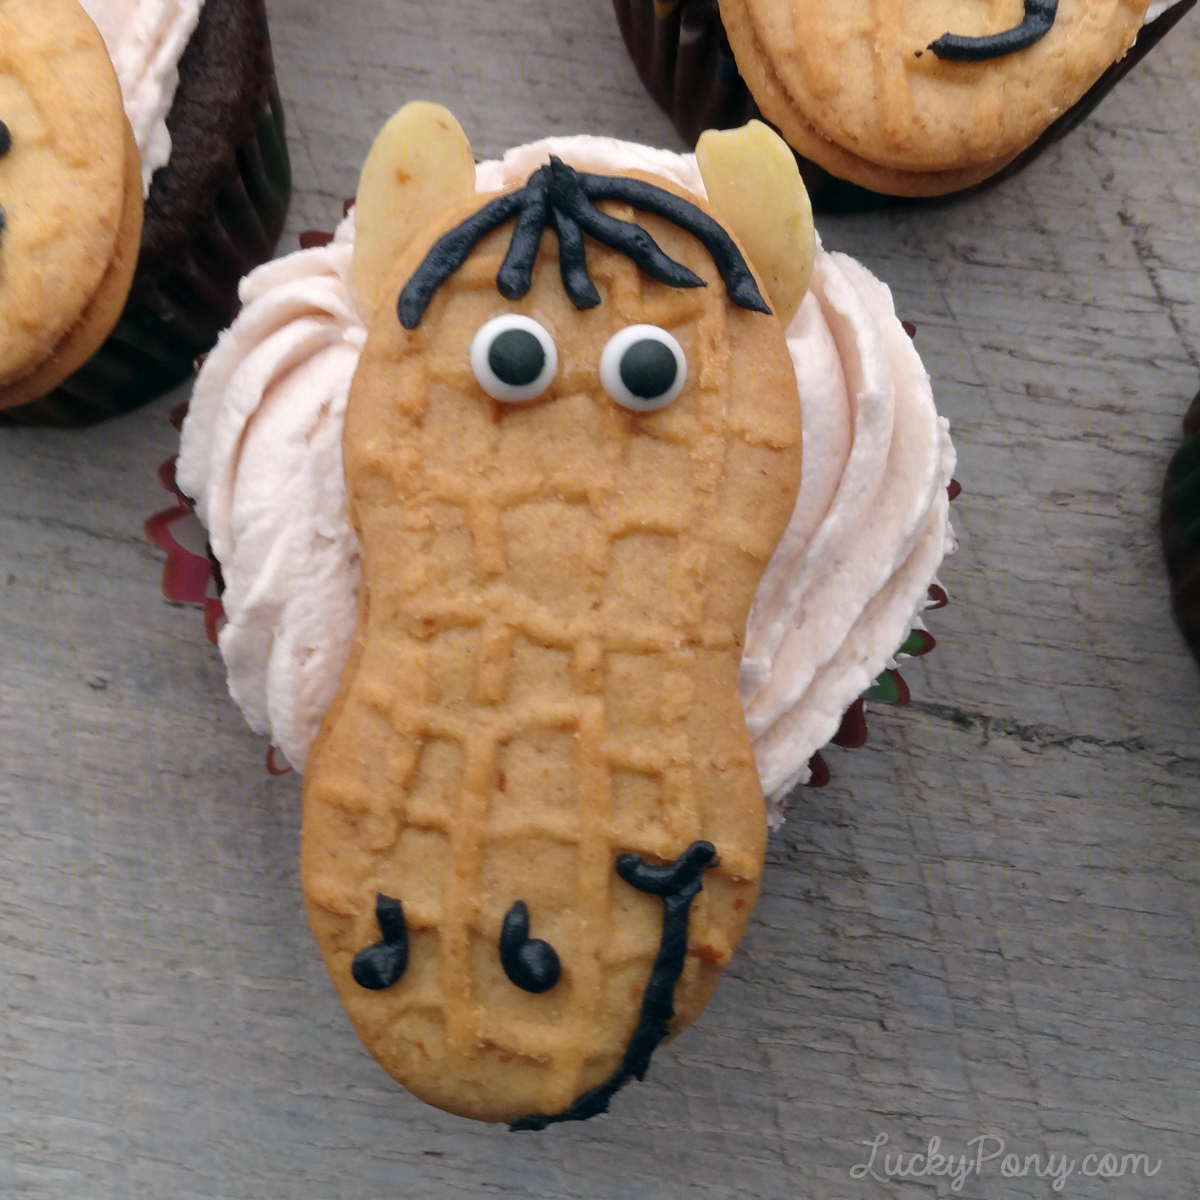
Almost done and your cupcake toppers should be recognizable as horses by now! All that’s left is to add mane forelocks and smiles! There are a couple good methods to do this part:
Option A. I mixed up a bag of premade buttercream, added black icing, put it in a piping bag with a very small tip (a #2 tip). If you made your own cupcake icing, add food coloring to the portion you set aside and use for decorating. Although royal icing is usually preferred for cookie decorating, royal icing is notorious for pooling into unrecognizable blobs when not mixed perfectly, so I recommend buttercream or cake icing for this project- it is much stiffer and will hold details.
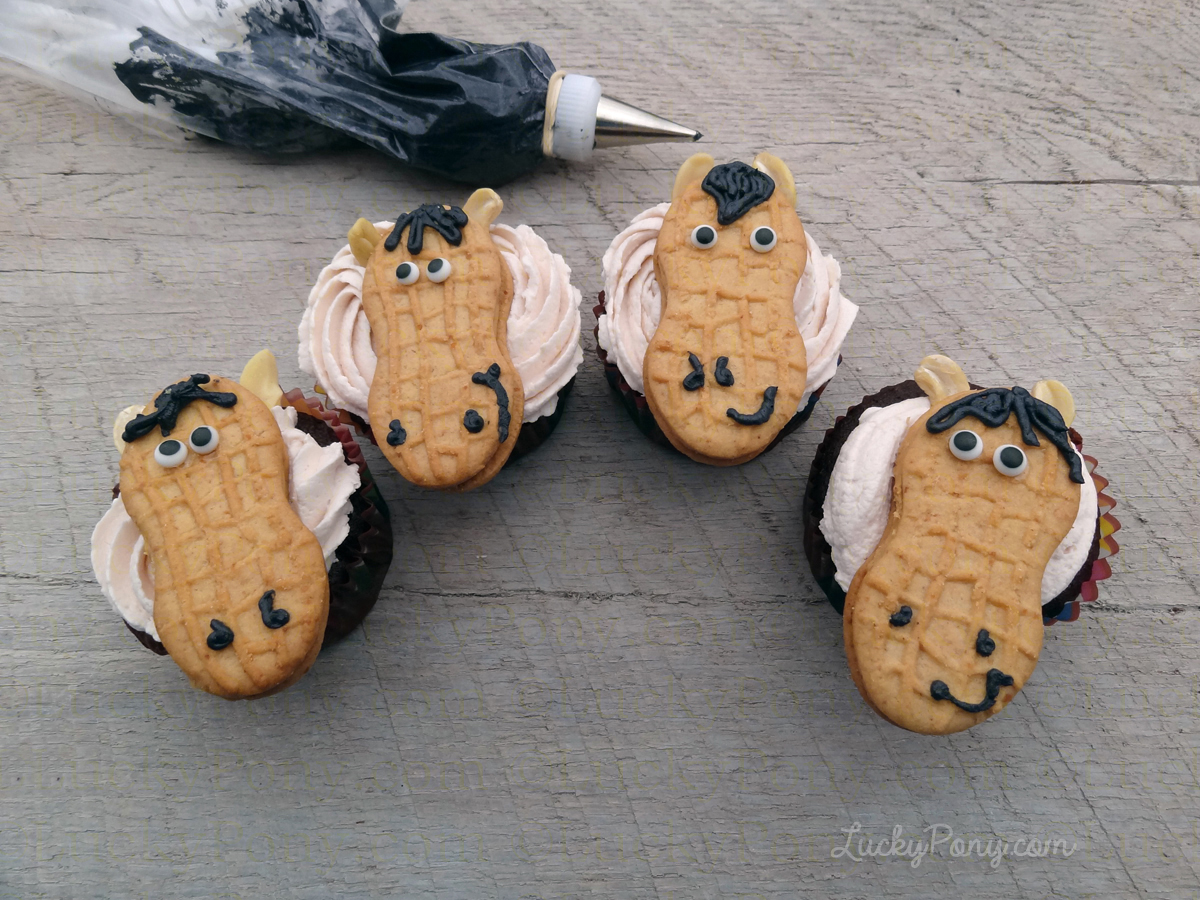
Option B. If you are making these cupcakes with kids, You may want to use AmeriColor Food Writer Markers. They’re much easier for small hands to control and they leave no mess to clean up. With these markers, you’d simply draw your horses nose, mouth, and forelock with the food-safe ink.
I hope you have as much fun making these with your family as we did with ours! We made these for our staff just before Christmas this year and even our mailman and delivery guys got to enjoy them with us!


So cute, how long before the party can I keep these ready without getting too soggy?
I can’t seem to find clear decorating gel. Do you think white would be ok to use?
Yeah- I think if you just used a very small amount (so no squishing out around the edges) it would work. Or you could try using just plain corn syrup, applied with a toothpick? Good luck! Let me know how yours turn out!